Checkout & Table Service¶
DiKAS offers two checkout modes: Direct sale (counter, snack bar, kiosk) and Table service (restaurant, café, beer garden). Both modes use the same interface — the difference lies in the workflow.
Direct Sale¶
Direct sale is designed for businesses without table service — snack bars, bakeries, kiosks, counter service. Articles are selected, immediately checked out, and settled.
Workflow¶
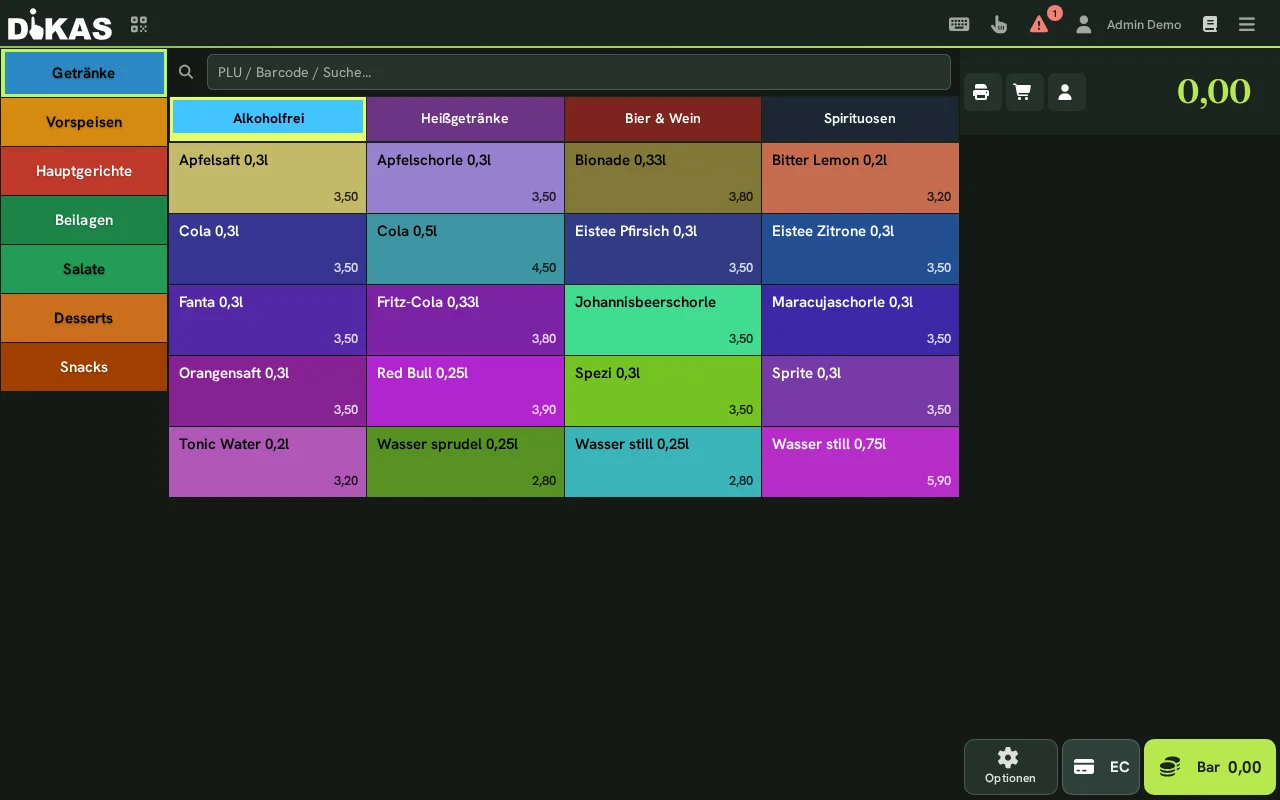
- Select article — Tap group → Tap article
- Change quantity (optional) — Tap article on receipt → Enter quantity
- Pay — "Pay" button → Select payment method → Done
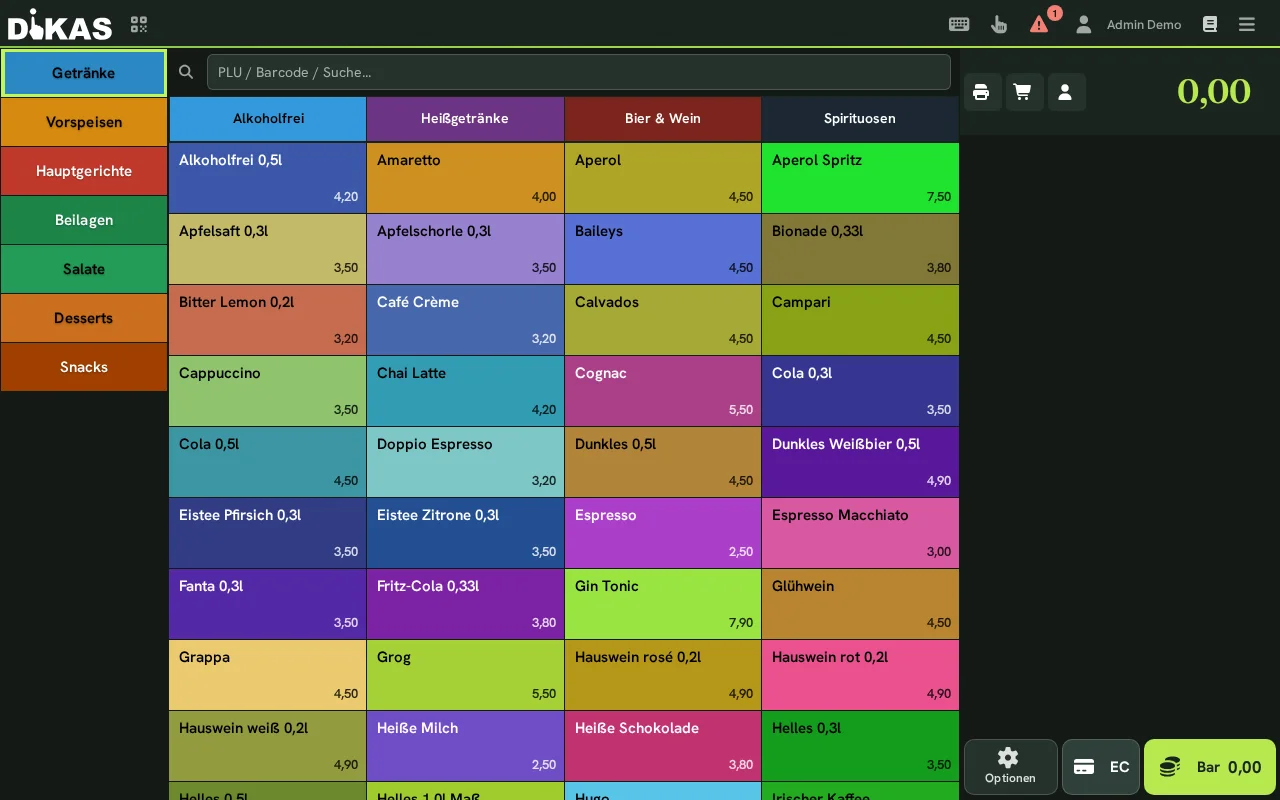
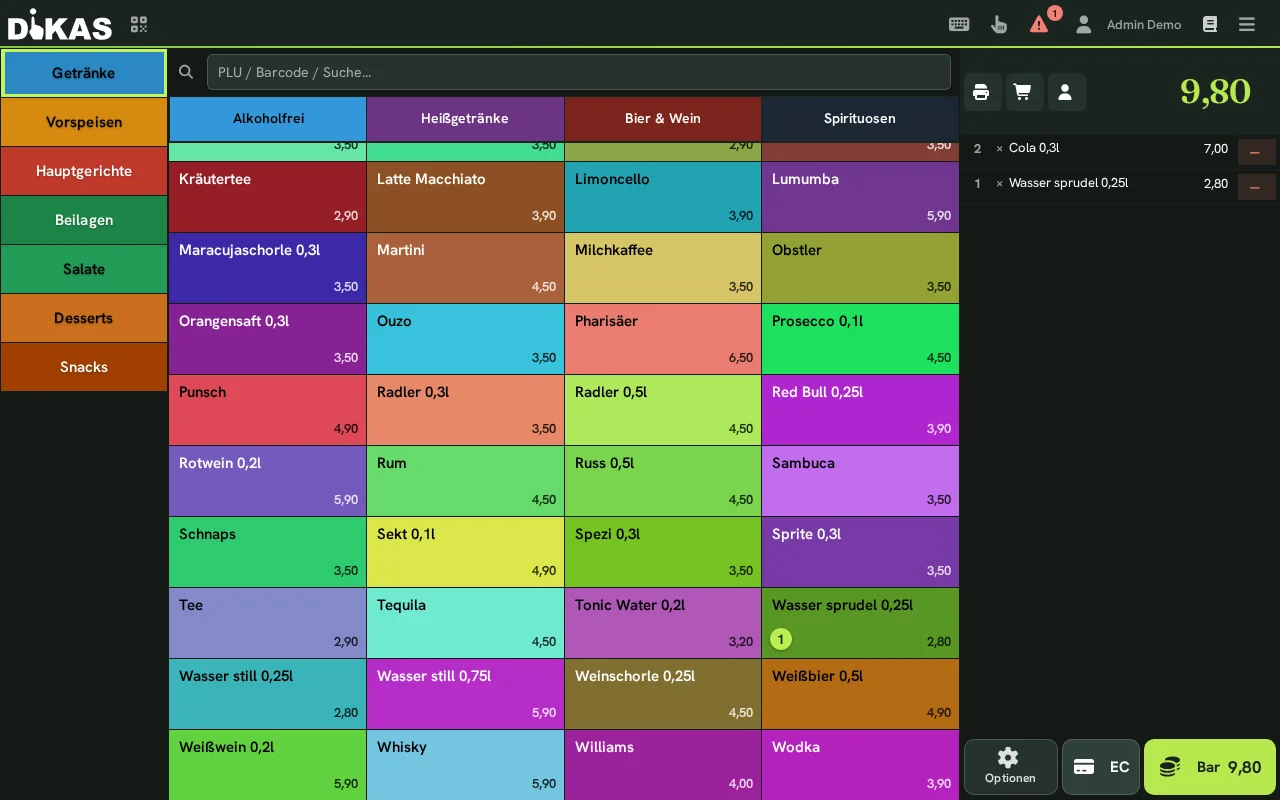
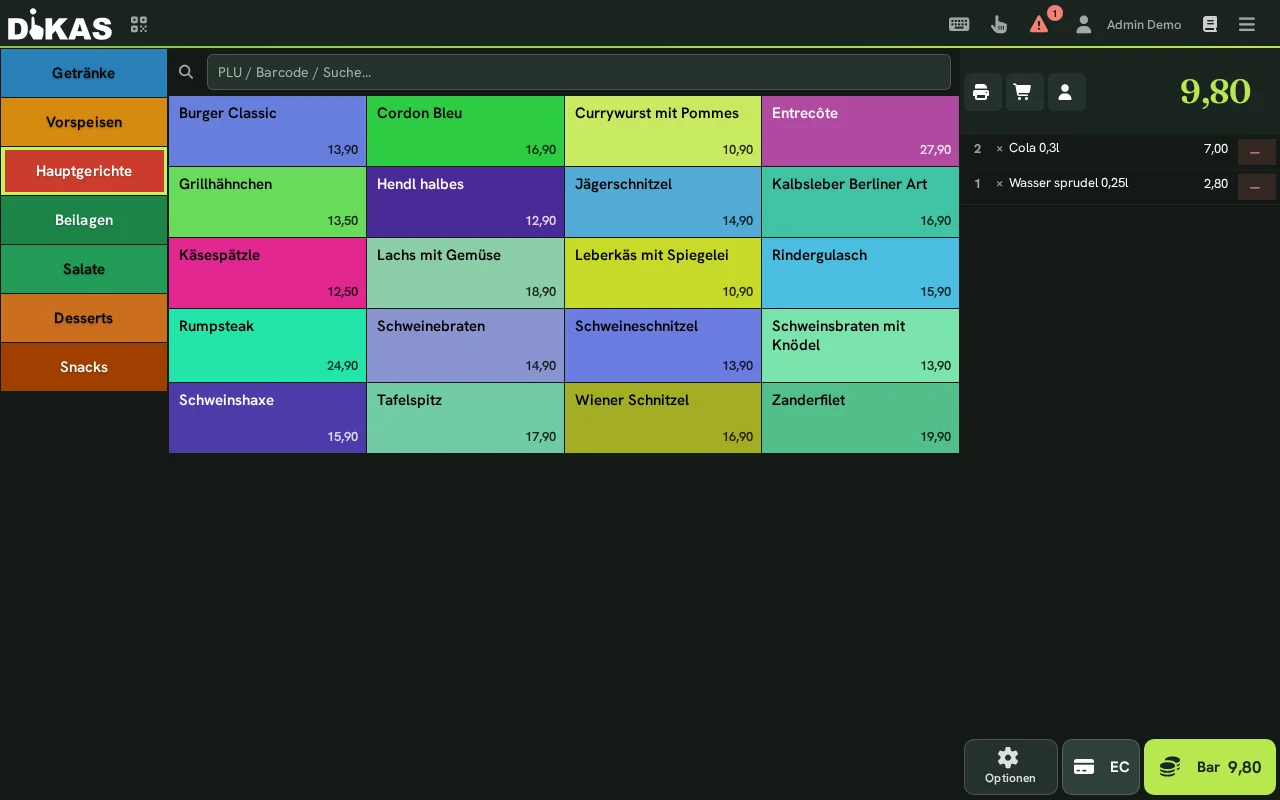
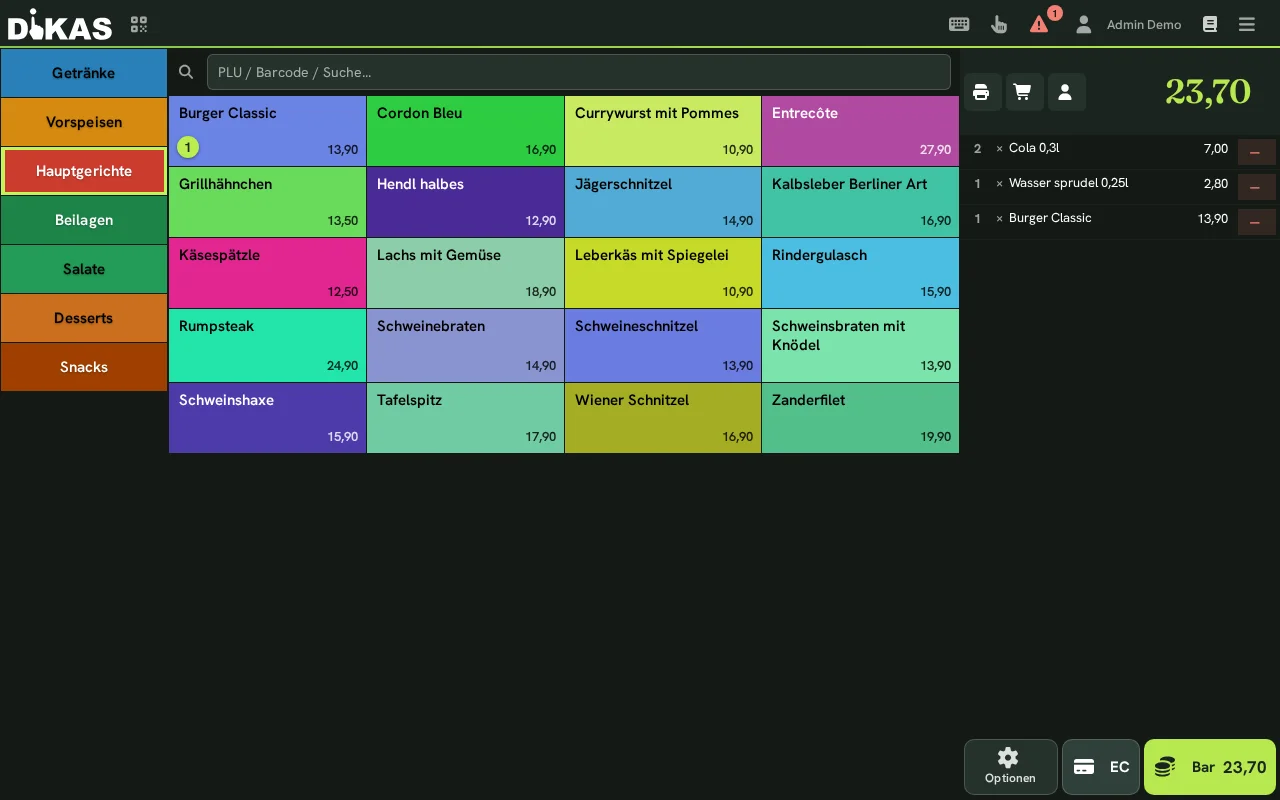
The receipt is printed immediately and the transaction is complete.
Quantity, Price, and Discount¶
| Action | How to |
|---|---|
| Increase quantity | Tap the article again |
| Enter quantity directly | Tap article on receipt → Enter number |
| Delete item | Tap article on receipt → Trash icon |
| Change price | Tap article on receipt → Override price |
| Apply discount | Tap article on receipt → Enter discount in % |
| Tip | Select tip article → Enter amount |
→ For goods sold by weight: Selling weighed articles at the POS. Tapping a weighed article — in direct sale as at the table — first opens the weighing keypad for the weight in grams; tapping the quantity of a weighed line re-weighs it instead of adding 1.
Manual Article¶
For articles not listed in the menu:
- Tap "Manual" (or article search)
- Enter description and price
- Select the tax class (19% or 7%)
- Confirm — the article appears on the receipt
💡 Tip: The manual article is ideal for special requests, one-off items, or spontaneous offers.
Customer Selection in Direct Sale¶
If a regular customer is paying and you want to charge their account or credit points:
- Before paying: Tap the "Customer" button
- Search for customer (name, customer number, card number)
- Select customer
- The receipt is assigned to the customer
- Additional payment methods become available when paying:
- Customer credit (if credit is available)
- House tab (on account)
- Customer points are automatically credited
Play area: time via wristband¶
Indoor playgrounds and parent-and-child cafés bill play time via an NFC wristband directly at the direct till. You need at least one active time article as a rate (for example "Child from 3") — set-up under Play area with NFC card.
→ Set-up, deposit, problems and frequently asked questions on one page: Play area: time billed via NFC wristband
The till shows the dialogs and buttons of the play area in German; the English meaning is given in brackets.
Entrance
- Hold the wristband to the card reader.
- If no time is running for the wristband yet, „Tarif wählen" (select rate) opens with the active time articles. Tap the rate (or select it with the arrow keys and press Enter).
- The till reports, for example, "Karte 1234 · Kind ab 3 · Zeit läuft" (card 1234 · child from 3 · time running). The ticket stays empty — payment happens on the way out.
If a wristband deposit is set, the line „Armband-Pfand · Karte 1234" (wristband deposit) is also on the ticket after the start. Take payment for the deposit right away at the entrance with Bar (cash) or EC (card). The deposit only counts as paid once the payment has gone through; if you remove the line beforehand, no deposit is recorded for the wristband.
If the card belongs to a customer and should be used as a customer card as usual, tap „Stattdessen als Kundenkarte" (use as customer card instead) in the dialog.
Leaving
- Scan the wristband again. The time line appears in the basket, for example „Karte 1234 · Kind ab 3 · 1 h 42 min" with the current amount. The amount is updated every 30 seconds.
- Scan the family's other wristbands one after another. A second scan of the same wristband does not create a second line.
- Book drinks or food as usual and pay with Bar, EC or Optionen (options).
When you press Bar, EC or Optionen, the till stops the clocks and shows the time as a finished item. From that moment the amount is fixed; exactly this amount is charged. If it has grown since the scan, the till briefly shows the new amount — a second press is not needed.
Refunding the wristband deposit
If a deposit was paid for a wristband, the till automatically adds the line „Armband-Pfand Rückgabe · Karte 1234" (wristband deposit refund) with a negative amount to the ticket when you take payment and does not charge immediately: you see the new amount first. If a wristband is not returned, remove its refund line from the ticket. Then press Bar, EC or Optionen again.
Deleting a time line does not stop the clock
The minus symbol on a time line only removes the line from the basket — the wristband's clock keeps running. Once Bar, EC or Optionen has been pressed, the clock is stopped; the time then remains open and is paid at the next checkout.
Card reader as keyboard
A USB card reader that types the card number like a keyboard also works at the direct till — the number briefly lands in the search field and is recognised as a card.
As long as wristbands or a table are in the basket, no chain vouchers can be sold and no empties can be taken back; items from other tills are held back until payment.
Settle table¶
If the family ordered at a table in the café, bring the table into the basket and pay for everything together:
- In the bar above the basket, tap „Tisch abrechnen" (settle table, cutlery symbol). The button is visible as soon as the business uses time articles.
- The list shows all open tables with name, group and open amount — a running clock is included in the amount. Wristbands are marked with „Karte" (card).
- Tap the table (or select it with the arrow keys and press Enter). Its open items appear in the basket, with the table name above them.
-
Scan wristbands, book further articles, pay.
-
Only one table can be attached to the basket at a time; a second one replaces the first.
- „Lösen" (detach) takes the table out of the basket again; its items stay open at the table. After pressing Bar, EC or Optionen, the wristbands have been transferred to the table — it can then no longer be detached, but is paid.
- If you select a wristband with a running clock in the list, its time line appears as after a scan.
Table Service¶
Opening a Table and Ordering¶
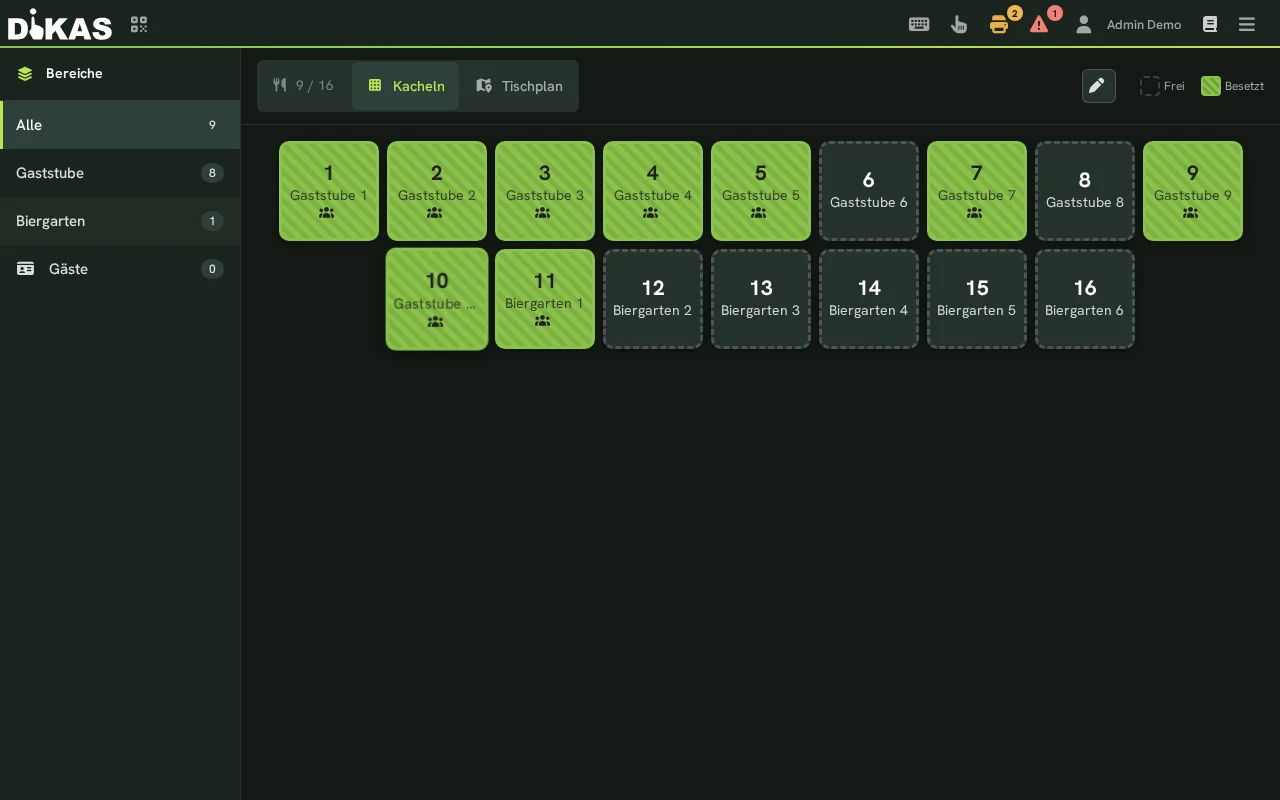
- Tap table — The table changes from green (free) to red (occupied)
- Select articles — Same as direct sale: Group → Article
- Tap "Place order" — The order is saved and sent to the kitchen/bar
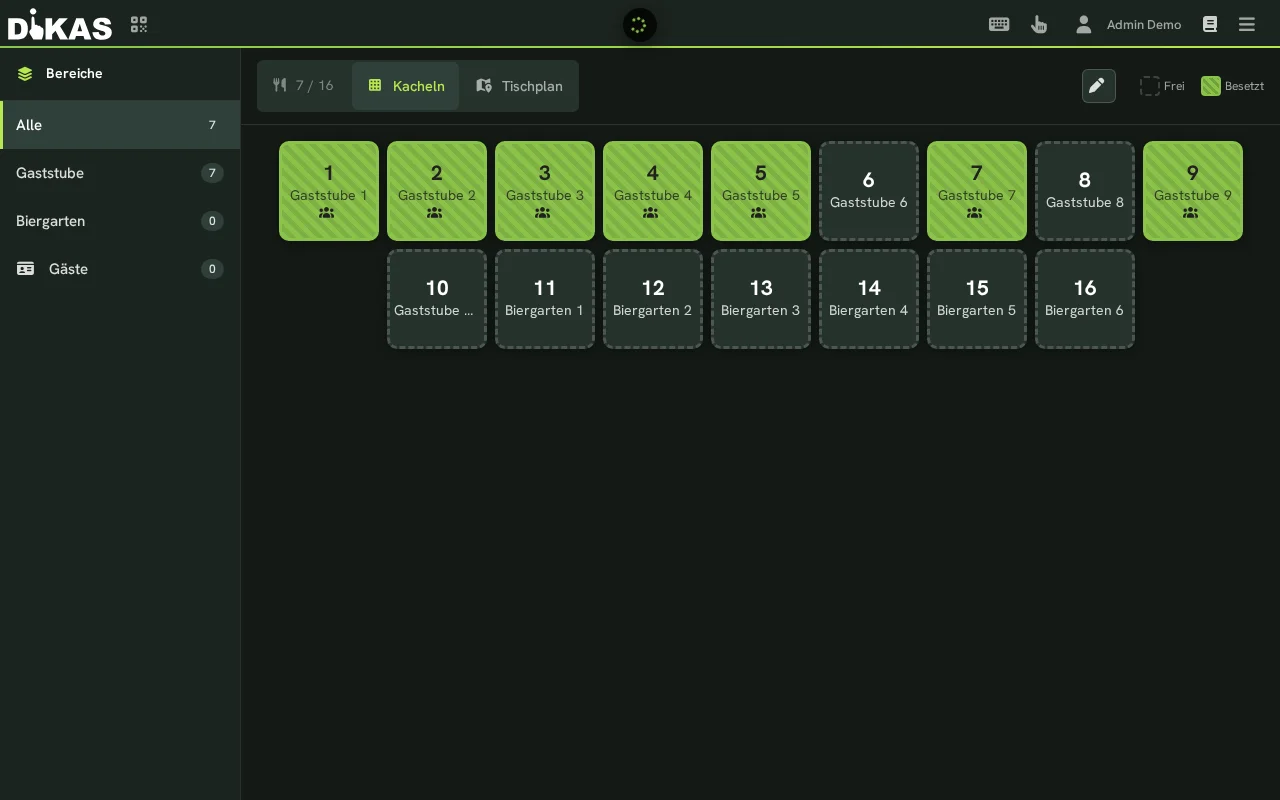
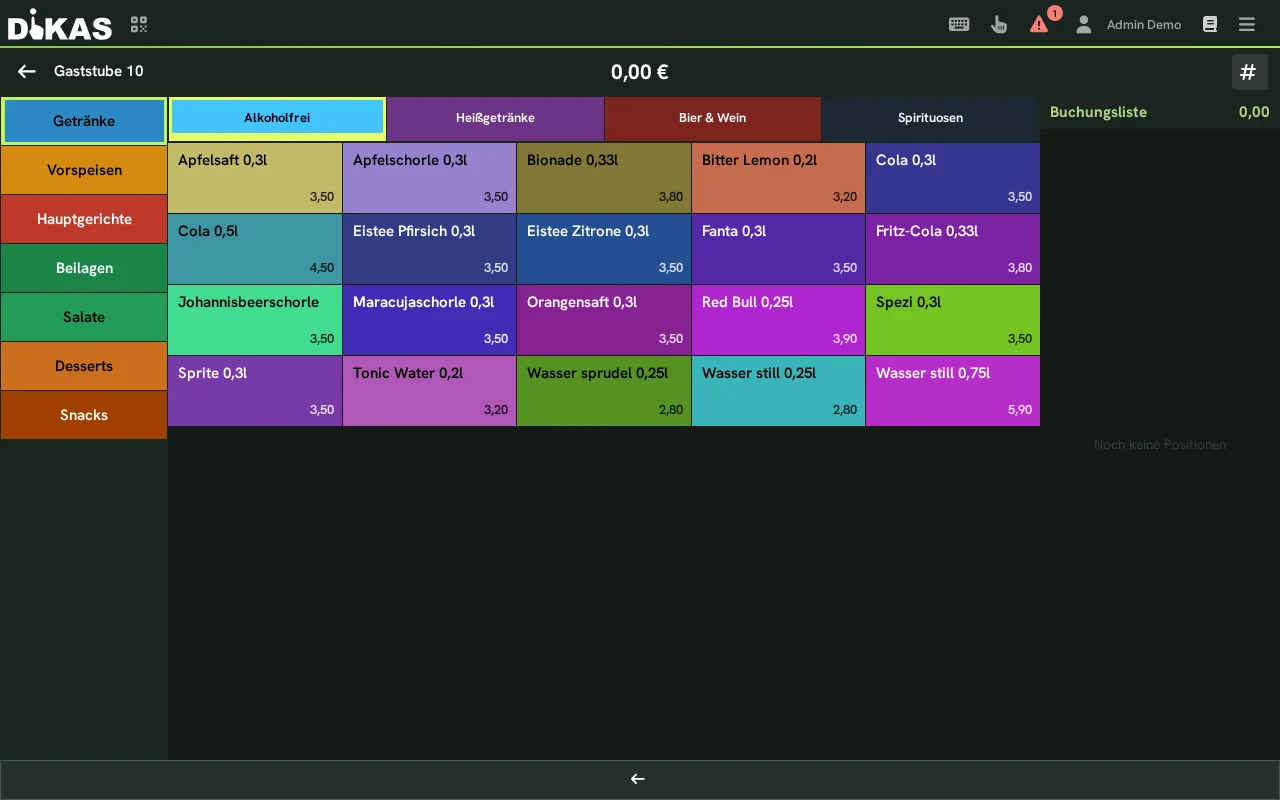
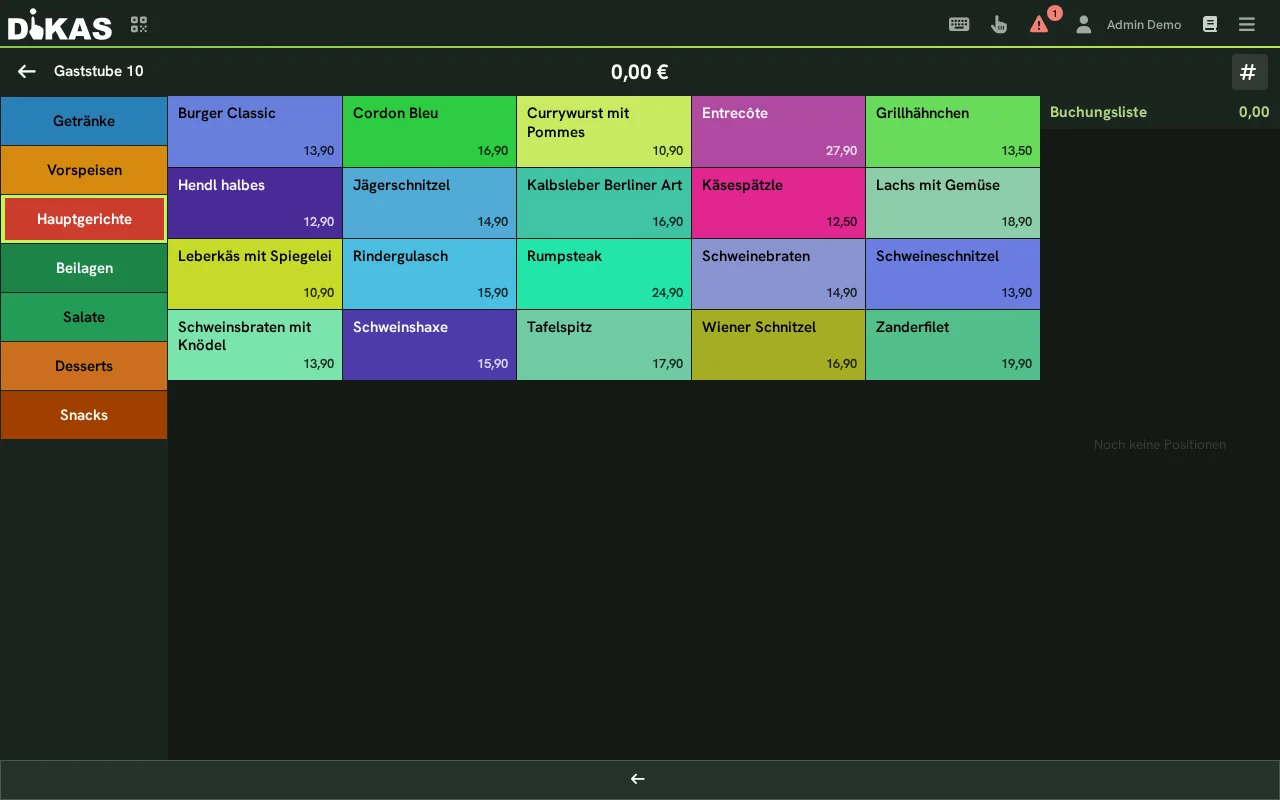
⚠️ Important: In table service mode, always tap "Place order", not "Pay". This way, additional orders can be added to the table without settling it.
What Happens When You Place an Order?¶
When you tap "Place order", the following occurs:
- Each article is saved as an individual OpenBon document
- All articles in an order share a common BonId (order number)
- The table status changes to "Occupied" (red)
- Print jobs are triggered:
- Station ticket to the responsible station (kitchen, bar, salad station)
- Consolidated order ticket to the configured printer (e.g., kitchen printer)
- Waiter receipt to the waiter's device (virtual printer
__kellner__) - Draught system: If the article has a draught system PLU, the transaction is automatically sent to the tap system
- TSE signature: The transaction is signed as "Bestellung-V1" (tax authority compliance)
Reordering¶
- Tap occupied table
- Select new articles
- Tap "Place order"
The new items are added to the existing order — with a new BonId, so the kitchen can identify what is new.
Time billing at the table¶
An article set up as a time article is not booked as a normal item at the table right away. Tapping it starts the time billing for this table instead.
- Open the table.
- Tap the time article, for example "Billardzeit" (billiard time). The session starts immediately.
- The running area shows the duration of use, the current amount and the hourly price currently in effect.
- Pause stops the billing. „Fortsetzen" (resume) lets the same session continue; the paused time is not charged.
- Stop bills the exact time of use and puts it as a normal item on the open table ticket. The table can then be paid as usual.
If the stored price window changes during a running session, the new hourly price applies automatically from that minute. The time article does not have to be stopped or booked again. A maximum amount, if set, caps the total price of the session.
Per table, not per person
Each table runs its own session. The number of people at the table does not change the time billing. Several billiard tables can therefore run independently of each other.
Stop before taking payment
An active or paused time billing keeps the table occupied. Only Stop creates the billable ticket item. This way a running session cannot be ended by accident when taking payment. Moving all items to another table does not release a table with a running clock either.
Card scanning at the direct till
An active time article — even a pure billiards rate — switches on the play area at the direct till: every card without a running clock opens „Karte … — Tarif wählen" (card … — select rate) when scanned. Read customer cards there via „Stattdessen als Kundenkarte" (use as customer card instead) (see Play area: time via wristband).
→ Setting up hourly prices, time windows and maximum amount: Articles & Groups
→ Time via NFC wristband at the direct till (play area): Play area with NFC card
Voiding Individual Items¶
Was a wrong article ordered?
Void entire article:
- Tap occupied table
- Tap item on the receipt
- Select "Void"
- Enter reason (e.g., "Wrong beverage")
- Confirm — the article is displayed with a strikethrough
Void partial quantity:
If a guest ordered 3 beers but only 1 needs to be voided:
- Tap item → "Void"
- Set quantity to 1
- Confirm
DiKAS splits the item: 2× beer remain active, 1× beer is marked as voided.
Void permission: Depending on the staff role, restrictions apply:
| Void level | Permission |
|---|---|
| 0 | No voiding allowed |
| 100 | Void own orders only |
| 999 | Void all orders |
| Admin | Void everything |
Transfer Table¶
Guests want to change tables?
- Tap occupied table
- Select "Transfer table"
- Tap new (free) table
- All orders are moved to the new table
The old table is automatically set to free again.
Merge Tables¶
Merge two tables into one:
- Tap first table → "Transfer table"
- Tap the other (occupied) table
- The orders from both tables are now combined
🍽️ Course Control (Courses)¶
Course control coordinates the sequence in which dishes are served from the kitchen.
What Is a Course?¶
A course describes the order in which dishes are served:
| Course | Typical |
|---|---|
| 1 | Appetizer / Soup |
| 2 | Main course |
| 3 | Dessert |
| 4–6 | Additional courses (e.g., intermediate course, cheese) |
Changing Courses¶
- Table is open and has orders
- Tap the "Course" button or select the course in the table info dialog
- The course is updated for all open items on the table
- Printers with course ticket enabled receive a notification
The kitchen can see that the next course should be prepared.
Course Ticket¶
Printers can be configured to automatically print a course ticket with each course change. This is enabled in the article print settings under Station ticket → Course ticket. This way, each station (kitchen, salad bar, dessert) knows when the next course begins.
Table Status and Colors¶
Each table in DiKAS has a status represented by a color in the table overview:
| Color | Status | Meaning |
|---|---|---|
| Green | Free | Table is available, no orders |
| Yellow | Newly occupied | Table opened, but no order placed yet |
| Red | Occupied | Open orders present |
| Orange | Reserved | Reservation for this table |
| Purple | Cleaning | Table still needs to be cleaned |
| Gray | Blocked | Table is not available |
Cleaning Requirement¶
If "Cleaning requirement" is enabled in the settings:
- After each payment, the table does not switch directly to "Free" but to "Cleaning" (purple)
- Staff cleans the table
- Long press on the table → Info dialog → "Mark as cleaned"
- Only then does the table become "Free" (green) again
This ensures that no new guest is seated at an uncleaned table.
Table Info Dialog (Long Press)¶
A long press (approx. 500 ms) on a table opens the Table info dialog — without opening the table.
Displayed Information¶
For occupied tables:
| Information | Description |
|---|---|
| Waiter | Who first opened the table |
| Since | How long the table has been occupied |
| Orders | List of all ordered articles (quantity, name, price, time) |
| Voided | Voided items (grayed out) |
| Total amount | Sum of all open items |
| Course | Current course (with selection buttons 1–6) |
For disco/card tables (NFC):
| Information | Description |
|---|---|
| Cardholder | Name, company |
| Card ID | NFC card number |
| Balance | Account balance |
| Credit limit | If enabled |
| Outstanding amount | Sum of unpaid items |
| Budget | Balance + credit limit − outstanding amount |
Tabs "Overview", "Protocol" and "Invoices"¶
The dialog has three tabs:
- Overview — what is described above. For an occupied table additionally First booking, Last booking, Time (since the first booking) and Open bookings.
- Protocol — what has happened at this table since the last day close, per visit with time, staff and total: Opened, Booked, Voided (with reason), Taken over / Handed over (from or to which table), Course released, Sent for preparation, Paid, Settled, Waiter call / Waiter call acknowledged, Cleaned. The day close empties the protocol.
- Invoices — this table's invoices from today's business day. An invoice can be expanded (items, tax breakdown), printed again with Reprint receipt and opened with Invoice (A4) as PDF. Voiding, changing the payment method and reopening are not possible here but in the receipt journal under POS → Menu → Invoices.
For cleaning: Button "Mark as cleaned"
💳 Split Payment¶
Selecting Individual Items¶
- Tap table → "Pay"
- The items are not preselected
- Tap the items the current guest is paying for
- "Pay" → Select payment method
- For the next guest: Select remaining items → "Pay"
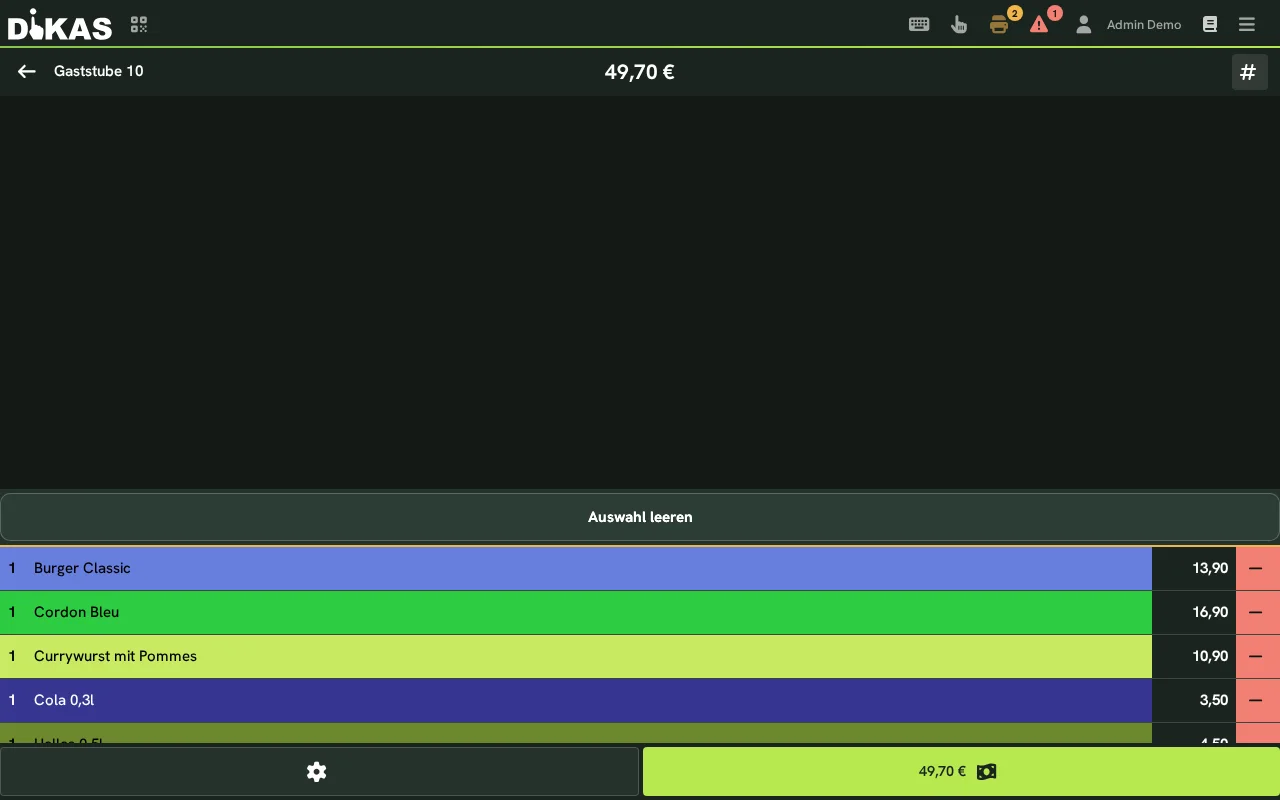
Each partial payment generates its own receipt.
Selecting Partial Quantities¶
If 3 guests each pay for 1 beer out of a total of 3 beers:
- "Pay" → Tap item "3× Beer"
- Set quantity to 1
- Select payment method → first guest has paid for 1 beer
- For the next guest: Select 1× beer again
DiKAS tracks the paid quantity per item (PayedCount). Only when all quantities are paid is the table fully settled.
Split by Amount¶
- Tap table → "Pay"
- All items are selected
- Tap "Split"
- Enter the amount the first guest is paying
- Select payment method → The remaining amount stays on the table
Split Payment with Multiple Payment Methods¶
A guest wants to pay partly in cash, partly by card:
- Tap "Pay"
- Select "Cash" → Enter partial amount (e.g., 10.00 EUR)
- The remaining amount is displayed
- Select "Debit card" → Remaining amount is sent to the terminal
Total amount:        25.00 EUR
─────────────────────────────
Cash:                10.00 EUR
Debit card:          15.00 EUR
─────────────────────────────
Paid:                25.00 EUR
Reservations¶
Creating a Reservation¶
- Open POS → Reservations
- Select date and time
- Enter guest name and number of guests
- Optional: Phone number, email, notes
- Select the desired table
- "Save"
Reservation Status¶
| Status | Meaning |
|---|---|
| Pending | Reservation created, not yet confirmed |
| Confirmed | Reservation has been confirmed |
| Seated | Guests have arrived and are seated |
| Completed | Guests have paid and left |
| Cancelled | Reservation was cancelled |
| No-Show | Guests did not show up |
Reserved tables appear orange in the table overview. The reservation blocks the table for the specified time period.
Hospitality Receipt¶
For business entertaining (tax-deductible under §4 para. 5 EStG):
- Order/check out articles as usual
- When paying, enable the "Hospitality receipt" option
- Optional: Specify tip amount separately for the hospitality receipt
- DiKAS prints a separate hospitality receipt with all legally required information
Practical Example: Restaurant "Bella Vista"¶
Scenario: Friday Evening, 4 Guests at Table 7¶
19:00 — Guests arrive: 1. Waitress Maria taps Table 7 → Table turns red 2. Beverage order: 2× Aperol Spritz, 1× Water, 1× White Wine 3. "Place order" → Bartender receives station ticket, waitress receives waiter receipt
19:15 — Ordering appetizers: 1. Maria taps Table 7 (already red) 2. 2× Bruschetta, 1× Carpaccio, 1× Soup 3. "Place order" → Kitchen receives consolidated order ticket with 4 appetizers
19:40 — Main course: 1. Maria changes the course to 2 → Kitchen receives course ticket 2. 2× Pasta, 1× Steak (medium), 1× Fish 3. "Place order" → Kitchen sees: Course 2, 4 main courses 4. For the steak, the options dialog opens: Select doneness → "Medium"
20:00 — Guest changes order: 1. 1× Pasta was wrong (guest wanted risotto) 2. Maria voids 1× Pasta → Reason: "Mix-up" 3. Orders 1× Risotto additionally
20:30 — Dessert: 1. Change course to 3 2. 2× Tiramisu, 1× Panna Cotta 3. "Place order"
21:00 — Paying (split): 1. Maria taps Table 7 → "Pay" 2. Couple 1: Selects their items → 47.80 EUR → Debit card 3. Couple 2: Selects their items → 52.20 EUR → partly cash (30 EUR), partly card (22.20 EUR) 4. Table becomes free (or purple if cleaning requirement is active)
Practical Example: Snack Bar "Curry Corner"¶
Scenario: Lunch Rush, Direct Sale¶
12:05 — Regular customer Mr. Müller: 1. Cashier selects customer "Müller" 2. 1× Currywurst (4.90 EUR), 1× Fries (3.50 EUR) 3. "Pay" → Customer credit: 35.20 EUR is displayed 4. Select "Customer credit" → 8.40 EUR is deducted 5. New balance: 26.80 EUR, Points: +8 points
12:08 — Tourist with a voucher: 1. 1× Döner (6.50 EUR), 1× Ayran (2.50 EUR) = 9.00 EUR 2. "Pay" → "Voucher" → Enter code "GS-X7Y2-M4N1" 3. Voucher has 15.00 EUR remaining balance → 9.00 EUR is deducted 4. Remaining balance on voucher: 6.00 EUR
12:12 — Business customer on account: 1. Select customer "Baufirma Schmidt GmbH" 2. 5× Currywurst, 5× Fries, 5× Cola = 54.50 EUR 3. "Pay" → "House tab" → Amount is posted to the customer account 4. Invoice can be created later in Admin and sent via email
Next Step¶
→ Payment Methods — All payment options in detail