Settings¶
Under Admin → Settings you configure the entire DiKAS system. The settings are organized in tabs and cover all areas — from master data to printers and terminals to integrations with banking systems, AI services and draught systems.
Admin → Settings
💡 The Normal/Expert toggle (top right) reduces the view: in Normal mode each category shows only its core sub-tabs (e.g. POS → Frontend/Payment types, Finance → Tax rates/TSE). Expert mode reveals all ~46 sub-tabs. Each category has a short intro box at the top, and cryptic options carry help icons (?).
Structure of the Settings¶
The settings are organized in categories with multiple sub-tabs each (not a flat tab list). The most important:
| Category | Sub-tabs (selection) |
|---|---|
| POS | POS mode/display, payment methods, customer display |
| Hardware | Printers, card terminals (ZVT & Tap-to-Pay/SoftPOS), draught systems, scales & labels, cash machines, caller ID |
| Print & Templates | Receipt designer, PDF templates, email (SMTP + templates), WhatsApp |
| Operations | General (currency, business day, auto end-of-day, printing, feature modules), delivery service, self-order, service areas, workstations, allergens, services (E2N, AI import, address services), misc |
| Finance | Tax rates, TSE/export, DATEV, cash register notification |
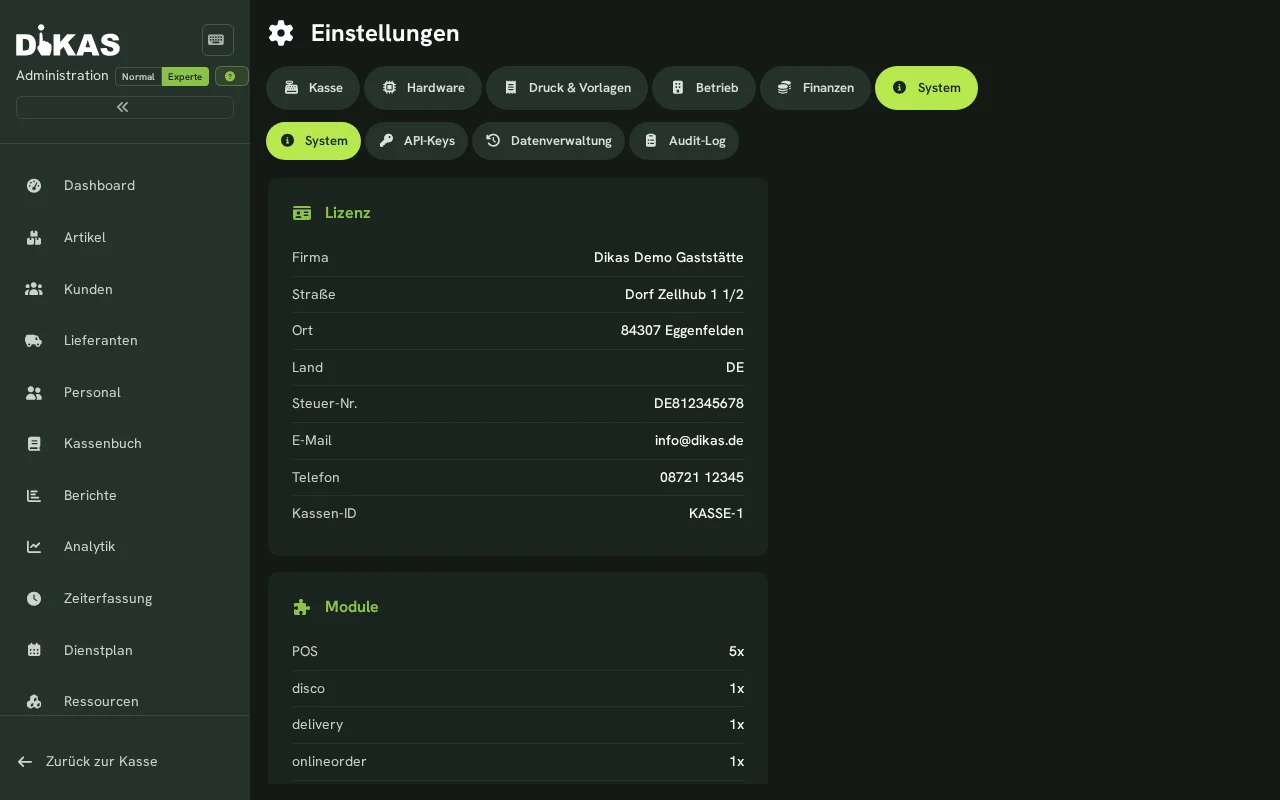
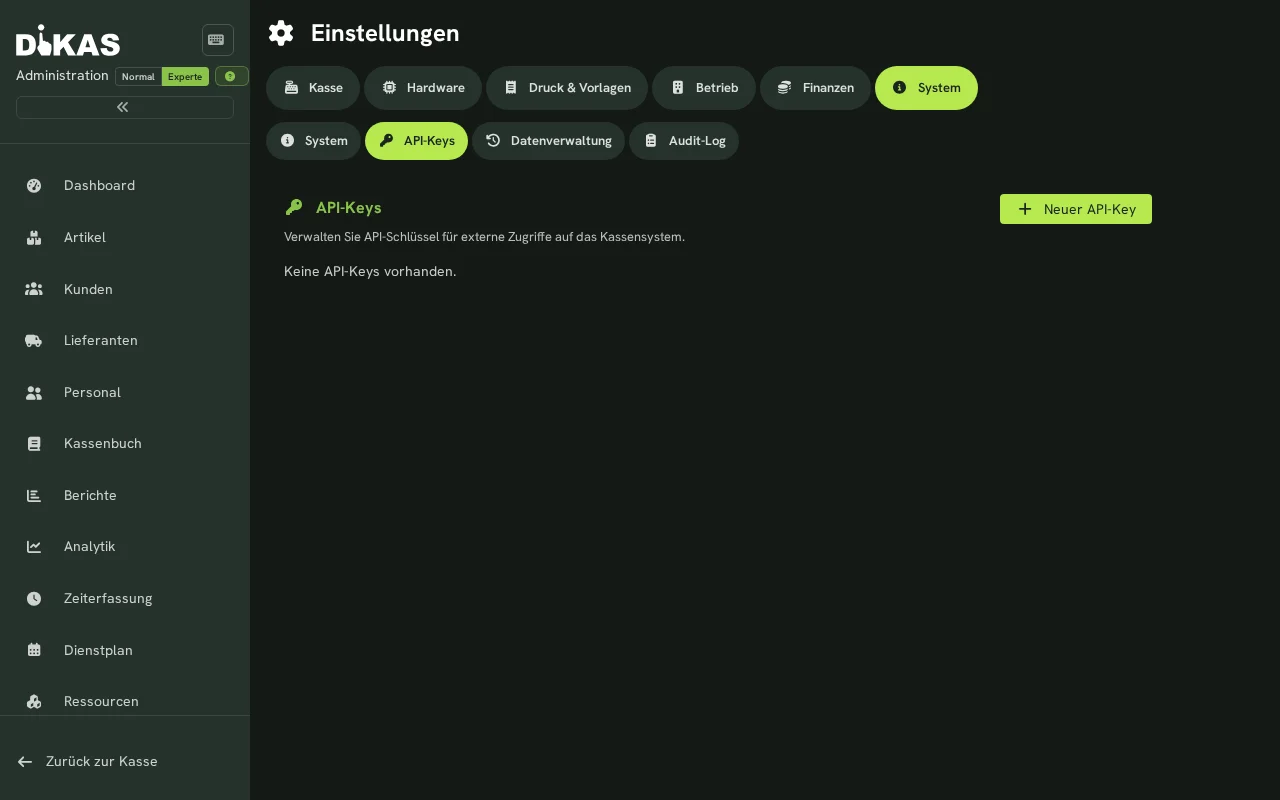
| System | License & server info, API keys, data import, cloud sync, backup/restore, audit log |
ℹ️ Important notes: - There is no "General" tab with business data/logo — license/business data is under System → System. The database provider cannot be changed here (display of license/version only). - Tabs like Delivery Service, Self-Order, Workstations, Customer Display, Alarms only appear when the respective feature is enabled. Feature modules under "Operations → General" are only visible when the matching plugin is loaded. - There are three separate configurations with their own Save: Operations (OperationalConfig), Display (FrontendConfig) and Server/Services (BackendConfig). For password/API key fields, leaving blank = unchanged (or clears the value).
1. General¶
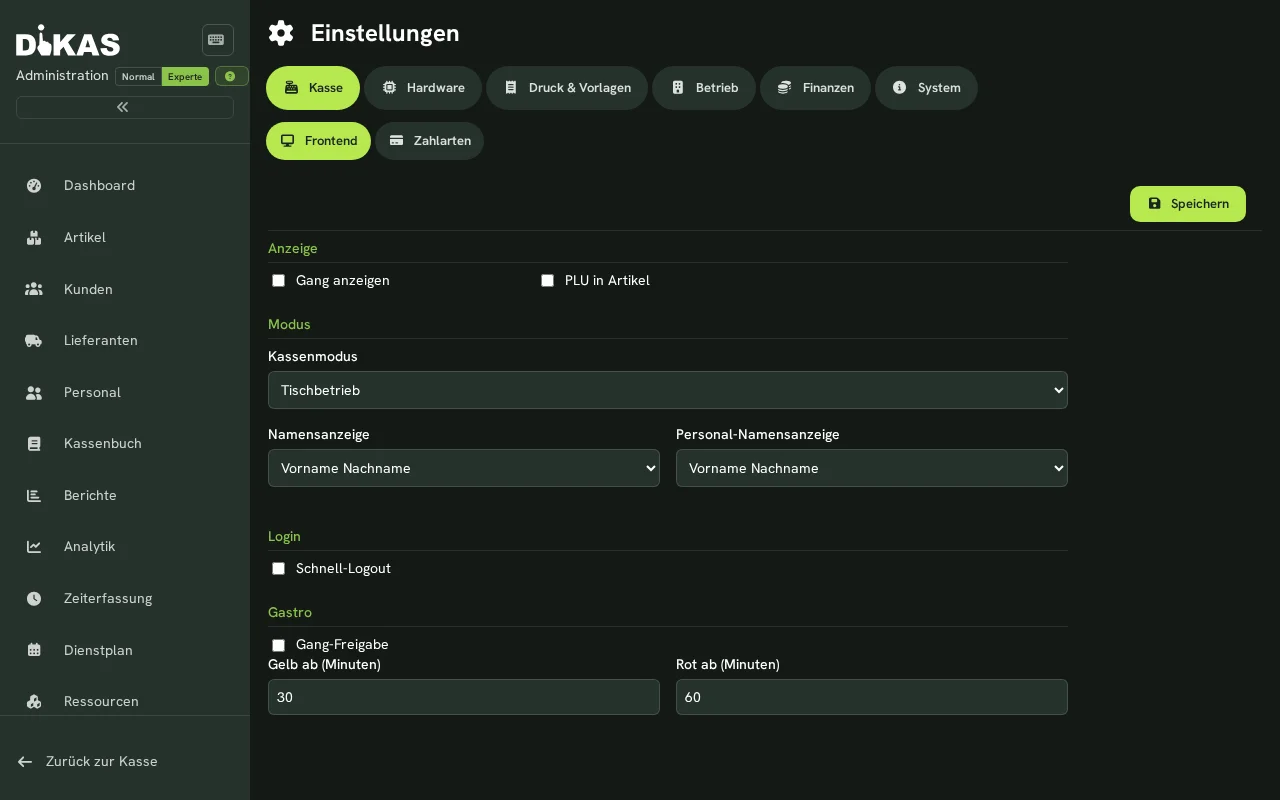
Business Data (read only)
Business name, address, tax number and VAT ID are automatically taken from the license and cannot be changed here. For change requests, please contact DiKAS support.
The business data appears on receipts, invoices and in the TSE signature.
| Setting | Description |
|---|---|
| Business Name | From license — printed on receipts and invoices |
| Address | From license — street, postal code, city |
| Tax Number | From license — mandatory information on receipts (§ 6 KassenSichV) |
| VAT ID | From license — if available |
| Logo | Printed on receipts (bitmap, max. 576px wide) |
Currency & Tax Rates¶
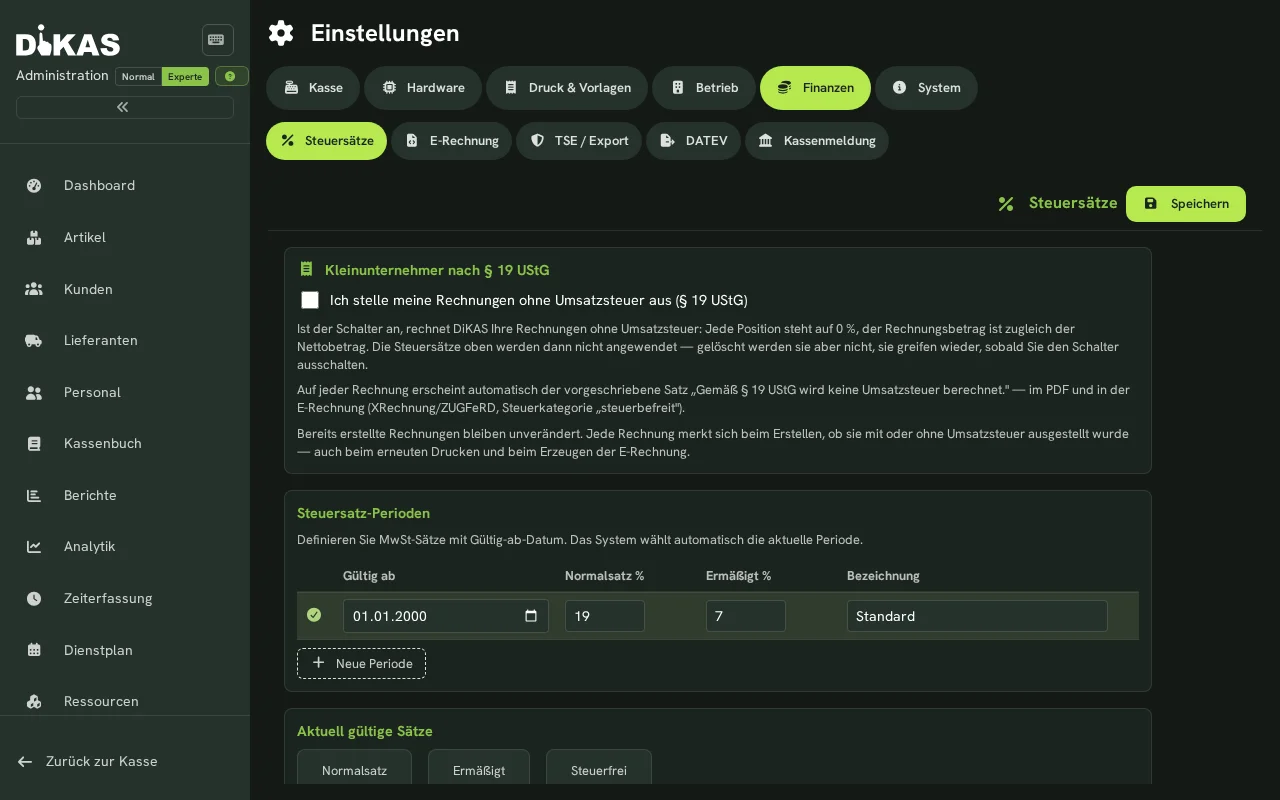
| Setting | Description |
|---|---|
| Main Currency | Default: EUR |
| Tax Rate Periods | Date-based tax rates (standard / reduced) |
Tax rate periods allow storing historical tax rates (e.g. the temporary VAT reduction in 2020). DiKAS automatically selects the rate valid for the booking date.
Payment Methods¶
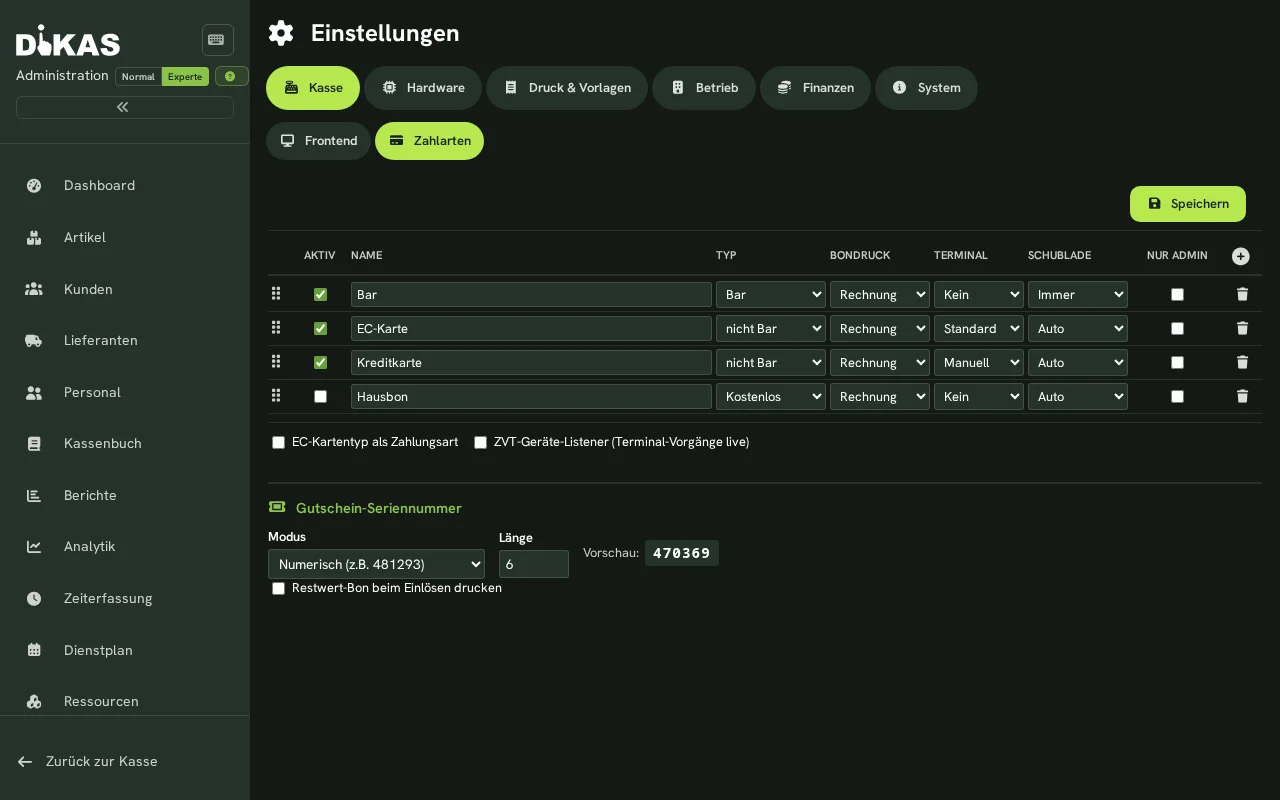
Each row is one payment method. The mask is labelled in German; the column "Bondruck" (receipt printing) decides whether the POS prints a receipt for that method: "Rechnung" (invoice) = a receipt is printed, "Keine Rec" (no receipt) = none is printed.
Keine Rec means: no receipt
If a payment method is set to "Keine Rec" in the "Bondruck" column, the POS prints no receipt for it — not even when automatic receipt printing is switched on.
This mainly concerns the payment method "Überweisung" (bank transfer): it is created automatically as soon as the first invoice is issued, and it is set to "Keine Rec" — an invoice does not need a till receipt. If you do want one, set the "Bondruck" column in the "Überweisung" row to "Rechnung" and save.
With a split payment one share is enough: as soon as one of the payment methods involved wants a receipt, one is printed.
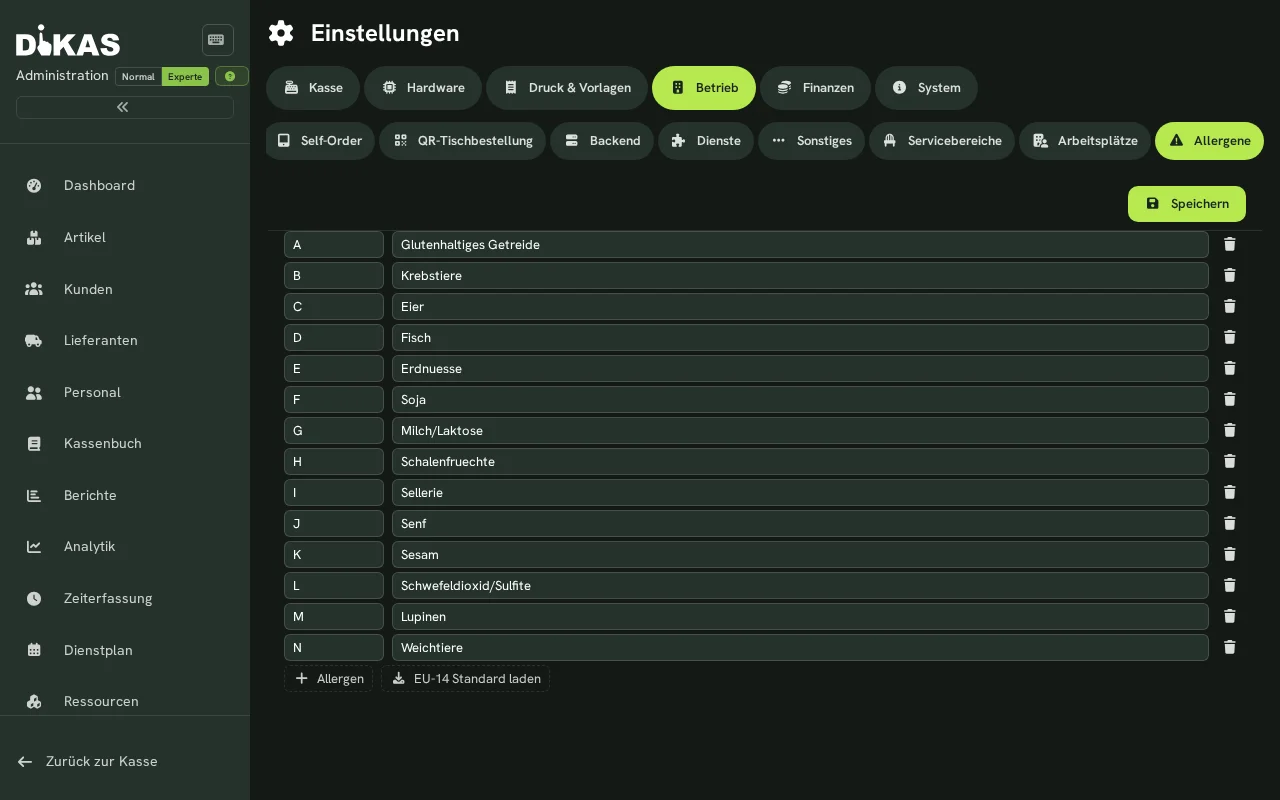
Allergens¶
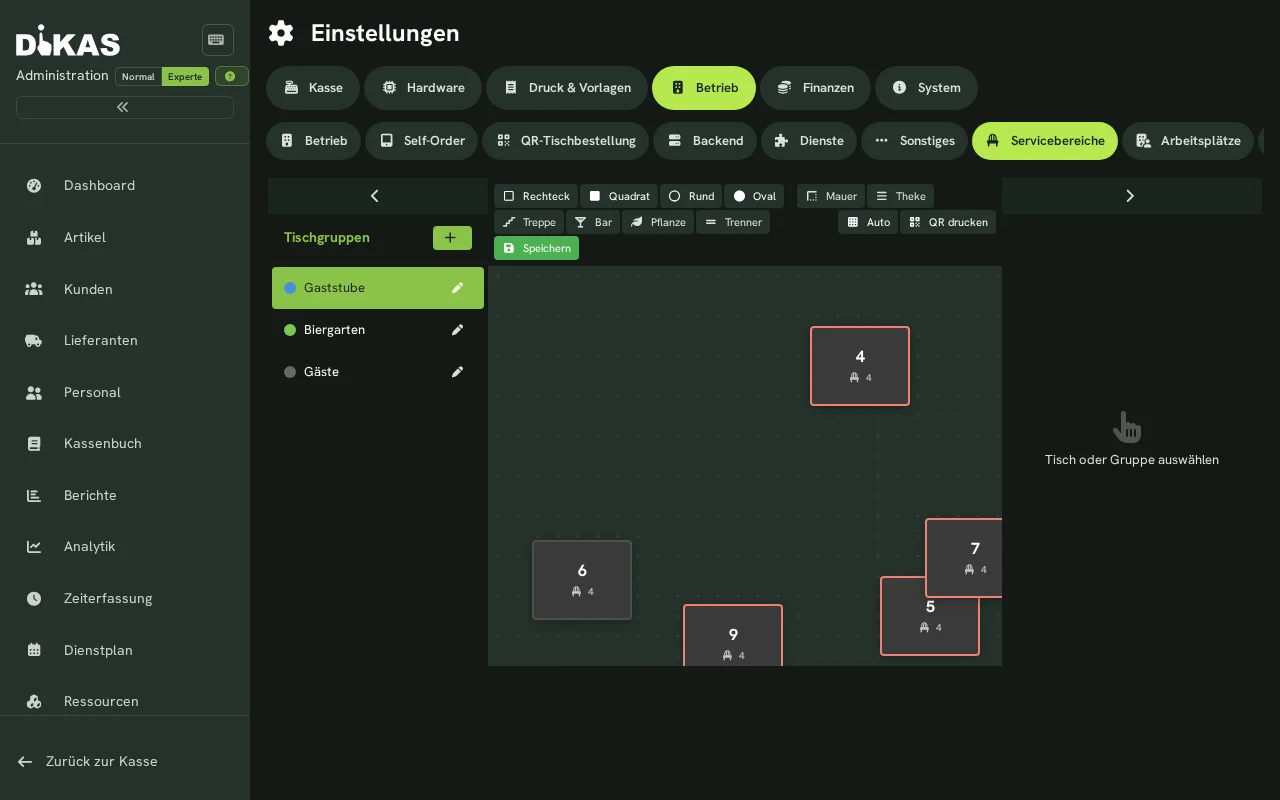
Service Areas¶
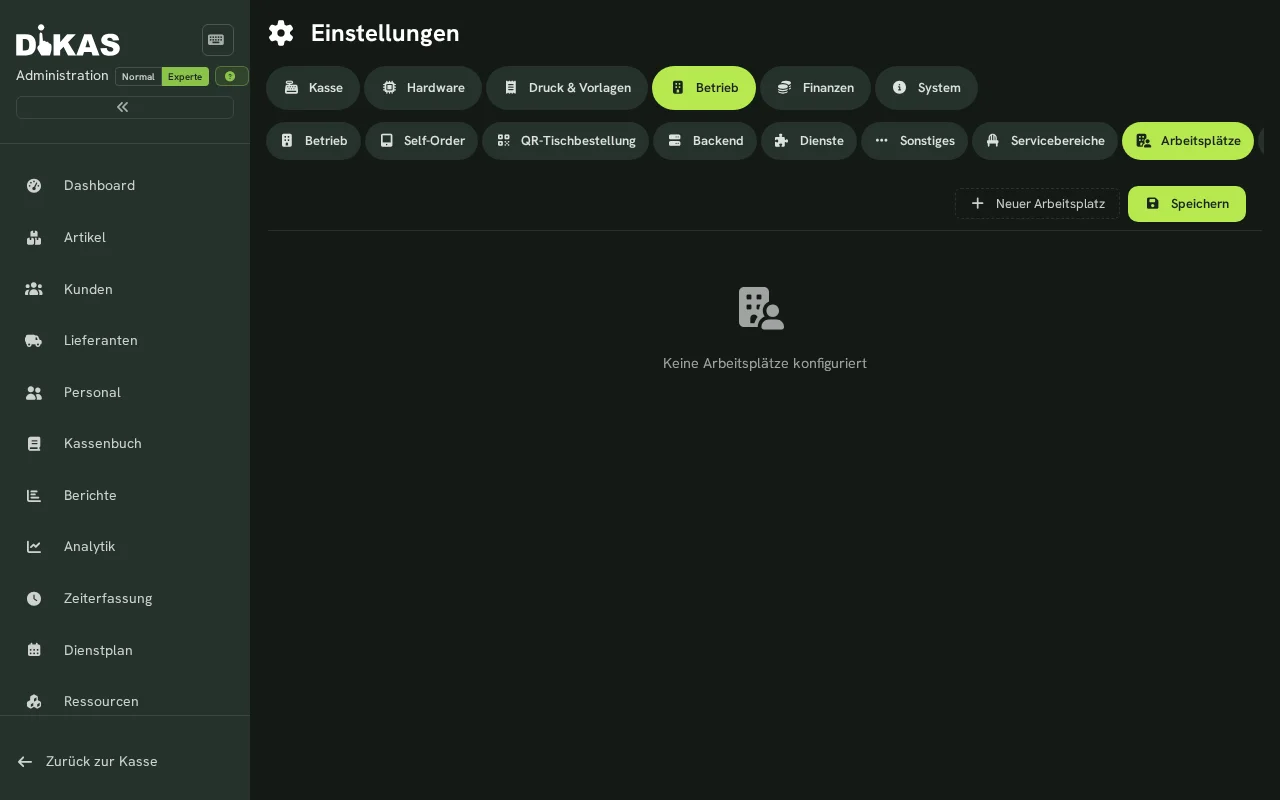
Workstations¶
2. Operations¶
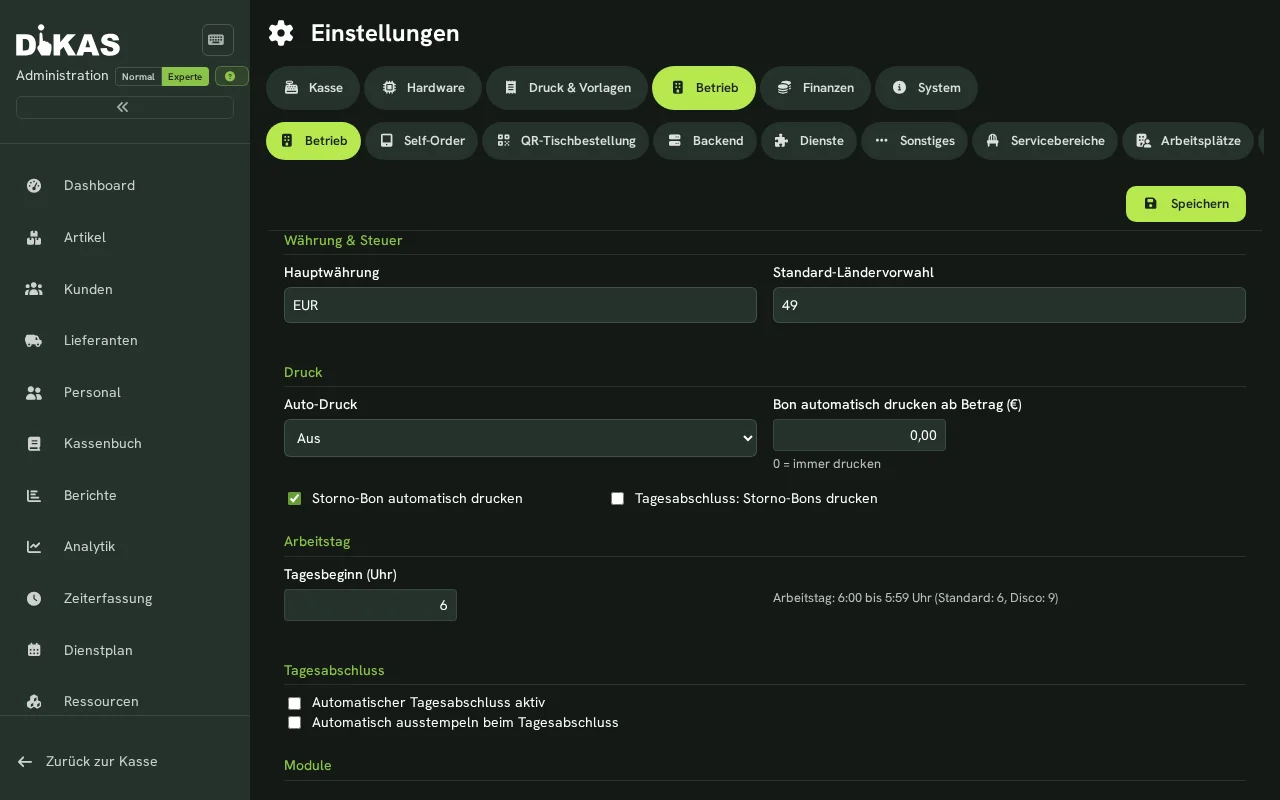
Operational configuration and feature toggles:
Printing¶
| Setting | Description |
|---|---|
| Auto Print | Controls automatic receipt printing after payment: Off, Always print, Kitchen only or All printers |
| Auto-print receipt from amount (€) | Minimum amount (gross) above which the receipt is printed automatically. Below this amount no automatic print happens (saves paper on small amounts). 0 = always print. Manual printing/reprinting is unaffected |
| Auto-print void receipt | Automatically print a void receipt on cancellations |
| End-of-day: print void receipts | Include void receipts in the end-of-day printout |
Minimum amount combined with Auto Print
The minimum amount works in addition to the Auto Print mode: if Auto Print is off, nothing prints anyway. If it is active, printing only happens from the configured amount upwards.
Business Day¶
| Setting | Description |
|---|---|
| Business Day Start | Hour at which a new business day begins (default: 6:00 AM) |
| Auto End-of-Day active | On/off switch for the automatic Z-report. Off = no auto close, time field hidden |
| Time | Only when the switch is on: fixed time for the automatic Z-report (e.g., 03:00) |
| Auto Clock Out | Automatically clock out employees at end-of-day |
Enable / Disable Features¶
| Feature | Description |
|---|---|
| Kitchen Display | Kitchen Display System (KDS) |
| Expense Recording | Record expenses in the POS |
| Time Tracking | Time clock for employees |
| Inventory Management | Stock management for articles |
| Customer Display | Customer-facing display at the POS |
| Online Ordering | Webshop integration |
| Workstations | Manage multiple register stations |
| Finance | Banking and invoicing module |
| HACCP | Hygiene documentation |
| Disco | Club management |
Pager¶
| Setting | Description |
|---|---|
| Pager | Where the pager number comes from: Manual — the till asks for the pager number (default), for venues with real pagers whose number is printed on the device. Automatic — number is assigned — the server assigns a consecutive number per business day (100–999, like the pickup numbers); the till asks nothing. |
This setting only answers where the number comes from. Whether a sale gets one at all is decided by the article switch "Ask for pager ID on payment" (see Articles; tab "General", only in the Expert view mode). If no such article is on the ticket, nothing happens in either mode.
→ In detail: Pager
Split table orders¶
| Setting | Description |
|---|---|
| Split table orders after (minutes) | Kitchen display: 0 = off — a table stays one card with everything on it. Otherwise every booking that arrives more than X minutes after the start of the current wave begins its own card with its own age and its own "done". Typical value: 5. |
The field only appears when the Kitchen monitor module is licensed and switched on in the module list.
→ In detail: Later orders as their own card
Table Cleaning Requirement¶
| Setting | Description |
|---|---|
| Cleaning Requirement | After payment: table is marked purple (status "Cleaning") |
| Process | Employee scans/clicks → table becomes free again |
Customer Credit¶
| Setting | Description |
|---|---|
| Top-up Bonus % | Percentage bonus on credit top-up |
| Top-up Bonus Amount | Fixed amount as bonus |
| Card Deposit | Deposit for customer card |
| Play area wristband deposit | Deposit per NFC wristband in the play area, charged at entry and refunded when the guest leaves (0 = off) |
| Validity Days | Days a customer card is valid |
Points¶
| Setting | Description |
|---|---|
| Points per Euro | How many points are earned per euro of revenue |
3. 🖨️ Printers¶
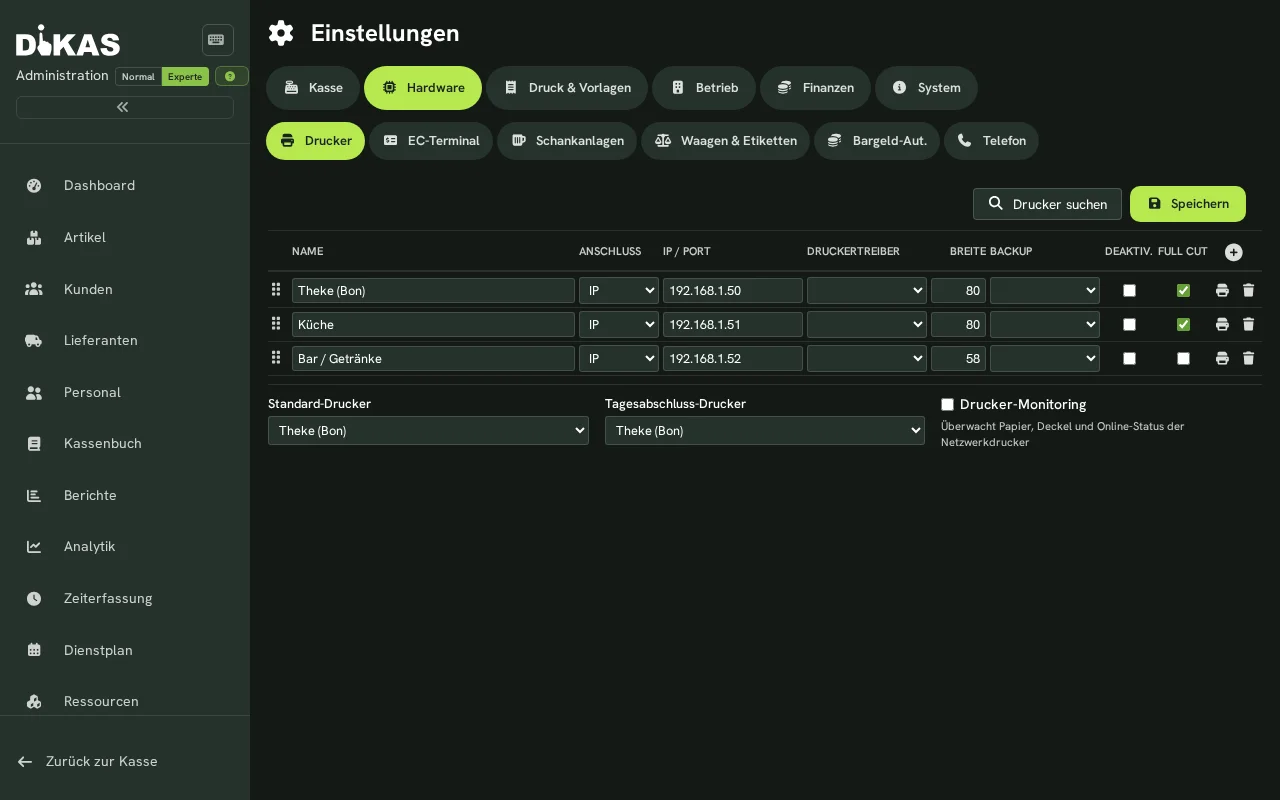
Configure receipt printers (ESC/POS compatible):
| Setting | Description |
|---|---|
| Name | Freely selectable (e.g. "Kitchen Printer", "Bar") |
| Type | Local (USB), Network (IP), Client, A4 (CUPS) |
| IP / Port | Network address (default port: 9100) |
| Receipt Width | 58 mm or 80 mm |
| Character Set | Codepage (default: 858). Receipt printers do not support Windows character sets such as 1252 in normal operation — DiKAS then prints in the standard character set automatically so umlauts come out right. |
| Backup Printer | Fallback in case of failure |
| Disabled | Temporarily disable the printer |
Printer Types¶
| Type | Description | Use |
|---|---|---|
| Local (0) | USB printer on the computer | Single-station POS |
| Network (1) | IP printer on the network | Standard for hospitality |
| Client (3) | Printing via client app | Mobile devices |
| A4 (4) | A4 printer via CUPS | Invoice printing |
Printer Search¶
Click "Search for printers" to automatically scan the local IP range (/24 of the server) for network printers on port 9100. Found printers are listed with IP address and — where determinable — hostname; clicking "Apply" adds the printer to the configuration. A4 printers (type 4) are additionally set up via the local hardware bridge (DikasArch/CUPS) if available — the CUPS printer name is automatically transferred.
💡 The scan may take a moment, as every address in the subnet is checked.
Default Printers¶
| Setting | Description |
|---|---|
| Default Printer | For receipts |
| End-of-Day Printer | For Z-reports |
A4 Direct Print (PDF)¶
An "A4 print" button is available in the receipt and print dialog. If DiKAS is running on a kiosk or workstation with a local DikasArch bridge and at least one A4 printer (type 4, CUPS) is configured, the PDF is printed directly at the local A4 printer — if multiple A4 printers are available, a selection dialog appears. If no bridge is available, the server-side print service alternatively prints, or the PDF opens for preview in a new browser tab.
In cloud mode, A4 printing — provided the location is reachable via a local DiKAS instance — can be printed directly at the location without the PDF opening in the browser. On the first A4 print, you are asked whether printing should happen "Locally at the location" or "Via the server" (browser tab); the selection is saved. The preferred print destination can be changed at any time under POS Settings → "A4 print destination".
4. Receipt Templates¶
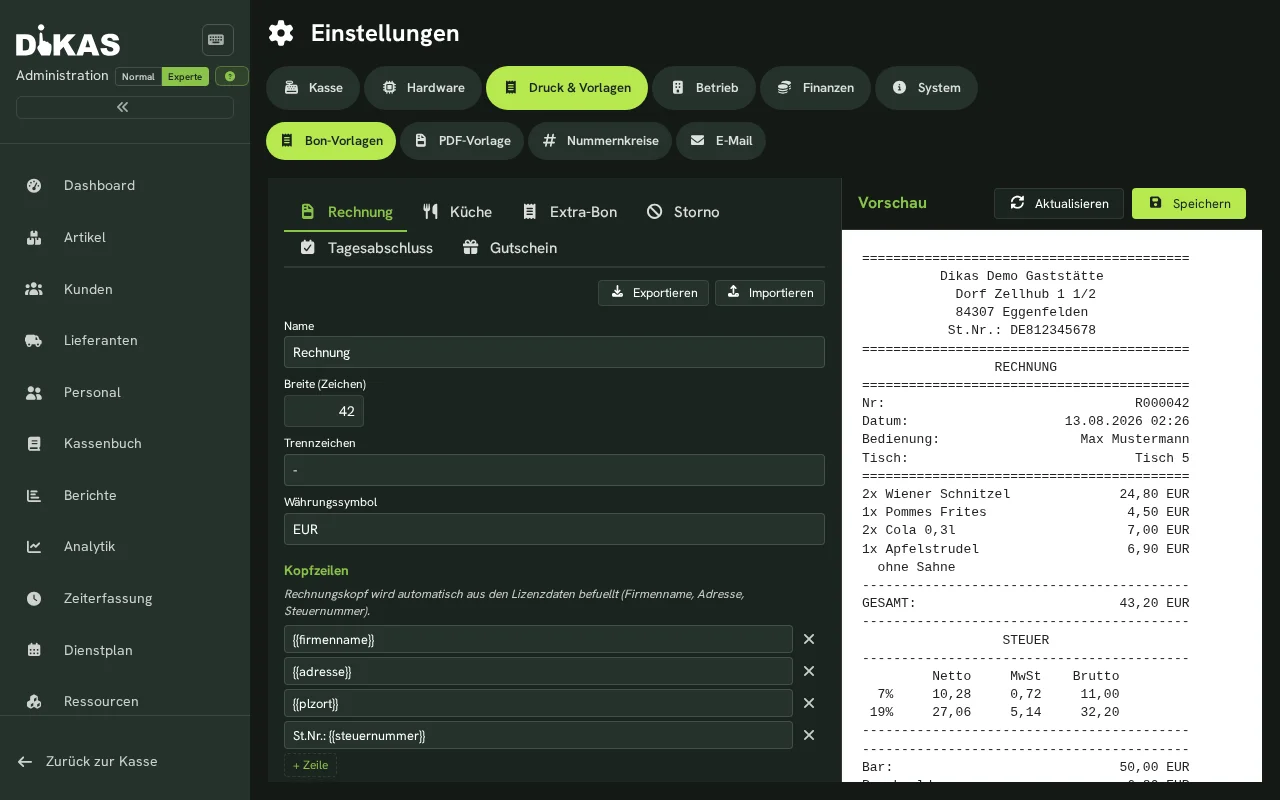
Template Types¶
| Type | Description |
|---|---|
| Invoice Receipt (0) | Receipt for the guest |
| Consolidated Order Ticket (1) | Order overview for the kitchen |
| Station Ticket (2) | Additional print (e.g. bar, counter) |
| Void Receipt (3) | For voids |
| End-of-Day Report (4) | Z-report |
| Voucher (5) | Voucher print |
Customizable Elements¶
Each template can be individually designed:
| Element | Description |
|---|---|
| Header Lines | Freely definable lines above the receipt content |
| Footer Lines | Freely definable lines below the receipt content |
| Logo | Show yes/no |
| QR Code | QR code on the receipt (e.g. for reviews) |
| TSE Data | TSE signature, transaction number, serial number |
| Tax Breakdown | Net/gross/VAT per tax rate |
| Payment Details | Payment method, change |
| Article Sorting | By course, group or receipt order |
| Fonts | Separate for groups, articles, options |
Receipt Designer¶
The visual receipt designer shows a live preview of the receipt with:
- Template type tabs (Invoice, Consolidated Order Ticket, Station Ticket, Void)
- Drag & drop for header/footer lines
- Font size selection
- Print simulator (test print)
5. 💳 Terminals (EC / Card Payment)¶
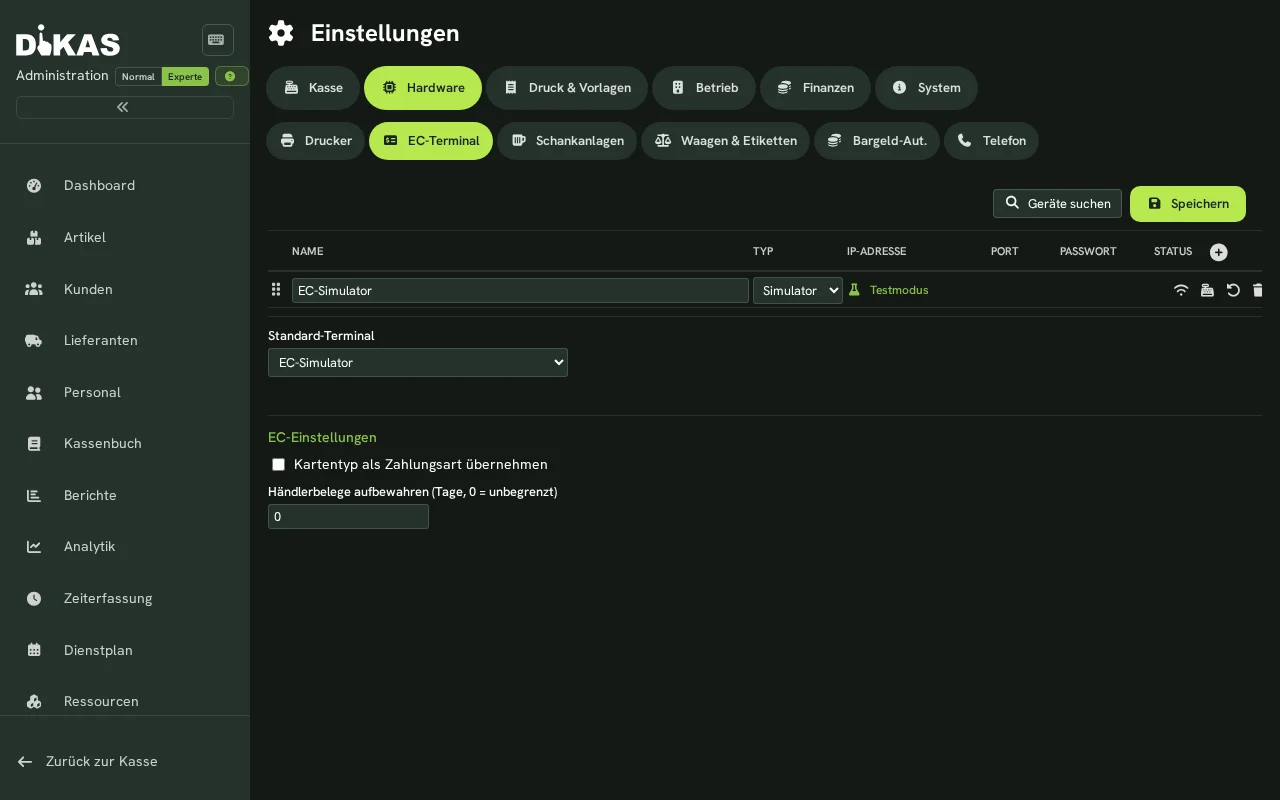
Adding a Terminal¶
| Setting | Description |
|---|---|
| Name | Label (e.g. "Card Terminal Counter") |
| Type | ZVT, SoftPOS or Simulator |
| IP Address / Port | Terminal IP or port — only for ZVT (default port 20007) |
| RS2 Terminal ID | Only for SoftPOS: the terminal ID from the Beyond SoftPOS activation (e.g. RS2001C5) |
| Environment | Only for SoftPOS: test (QA) or production |
| Merchant Email | Only for SoftPOS: the merchant account's email |
| "Check status" | Checks connection/readiness (green = connected) — works for ZVT and SoftPOS |
Terminal Types¶
| Type | Description | Connection |
|---|---|---|
| ZVT (0) | Classic card terminal (Ingenico, CCV, Verifone) | TCP/IP |
| SoftPOS (1) | Tap-to-Pay: the Android device itself as a contactless card terminal — certified technology of our partner RS2 | Android app/intents |
| Stripe Terminal (2) | Stripe card reader (Reader ID tmr_…), controlled server-side via the Stripe cloud — works even without a hardware agent |
Stripe cloud |
| SumUp Reader (4) | SumUp Air/Solo via your SumUp account; paired via pairing code (dedicated SumUp tab for API key and merchant code) | SumUp cloud |
| Simulator (99) | Test terminal without real payment (rejects every 2nd transaction) | Local |
ℹ️ For Stripe Terminal you enter the Stripe secret key and the location ID — the same credentials used for online ordering. Which terminals exist and which one fits your business: Hardware → Card Terminals.
Device Search (ZVT Terminals)¶
Click "Search for devices" to scan the local IP range (/24 of the server) for ZVT-capable card terminals on port 20007. Found devices appear with IP address and hostname in a list; "Apply" transfers IP and name directly into the terminal form. The scan runs in the background and may take a moment depending on network size.
Terminal Actions¶
- Pairing: Connect reader with the POS
- Status: Check connection
- Settlement: End-of-day total on the terminal
6. 🔐 TSE (Technical Security Device)¶
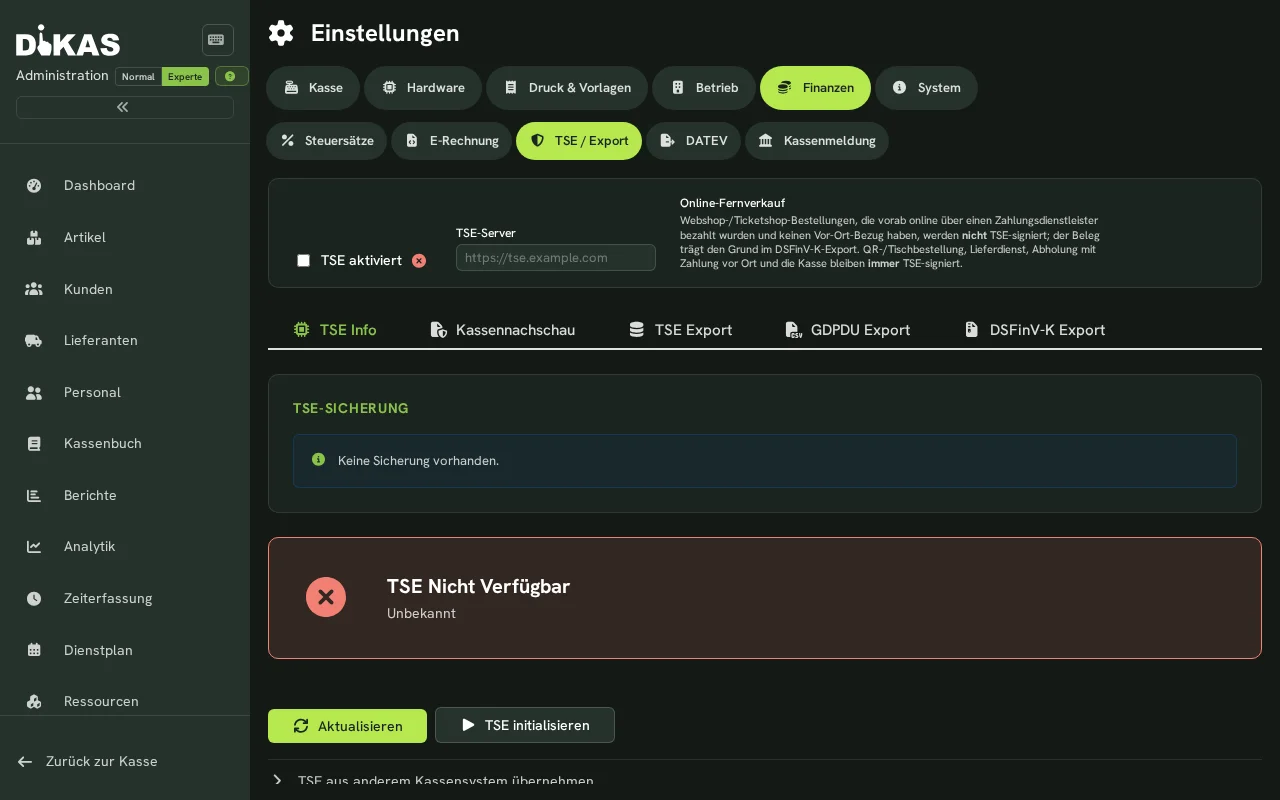
Mandatory in Germany since 2020 (§ 146a AO):
| Setting | Description |
|---|---|
| TSE Enabled | TSE signing on/off |
| TSE Type | Hardware (Swissbit) or proxy server |
| TSE Server | URL of the TSE proxy (e.g. Fiskaltrust) |
| POS Serial Number | Unique identifier of the register |
| Client ID | TSE client identification |
| Fiskaltrust | Use Fiskaltrust middleware |
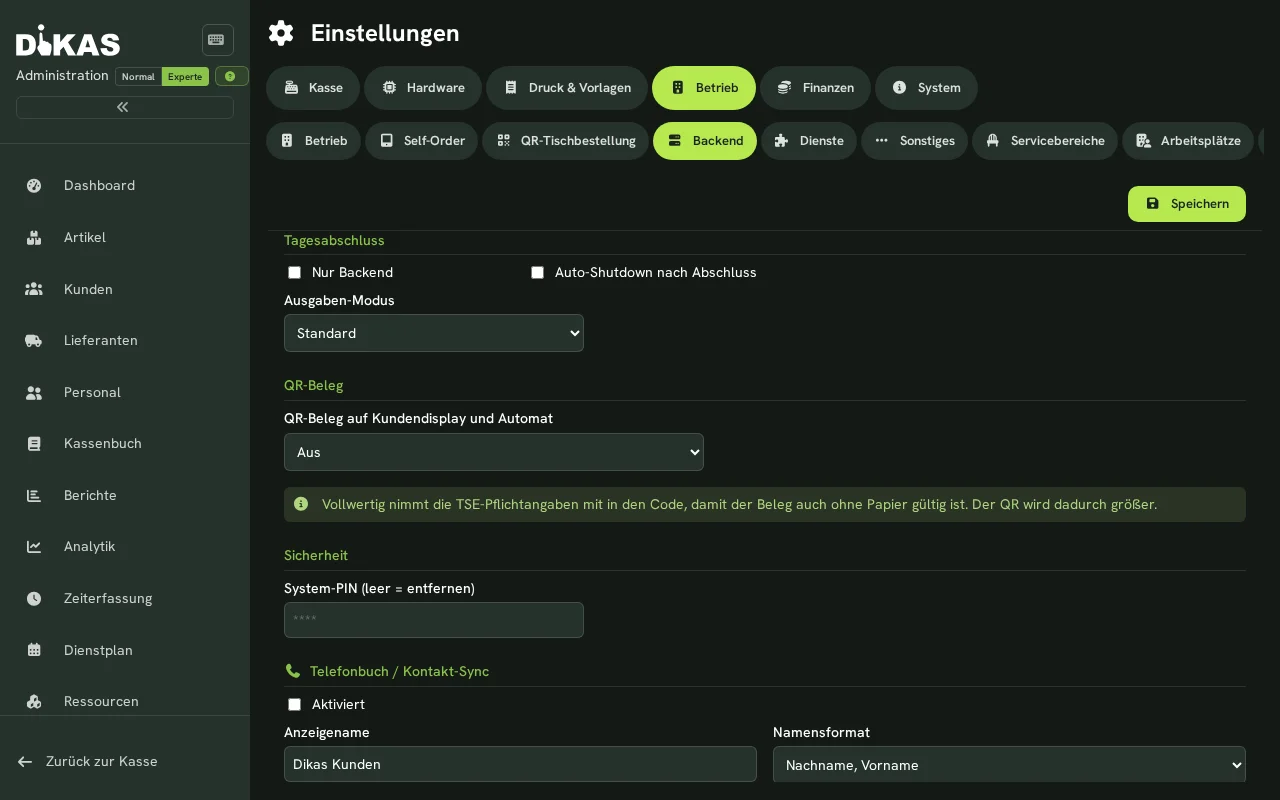
DiKAS signs all POS-relevant transactions: receipts (Kassenbeleg-V1), orders (Bestellung-V1) and other transactions such as shift changes and end-of-day reports (SonstigerVorgang).
7. Email¶
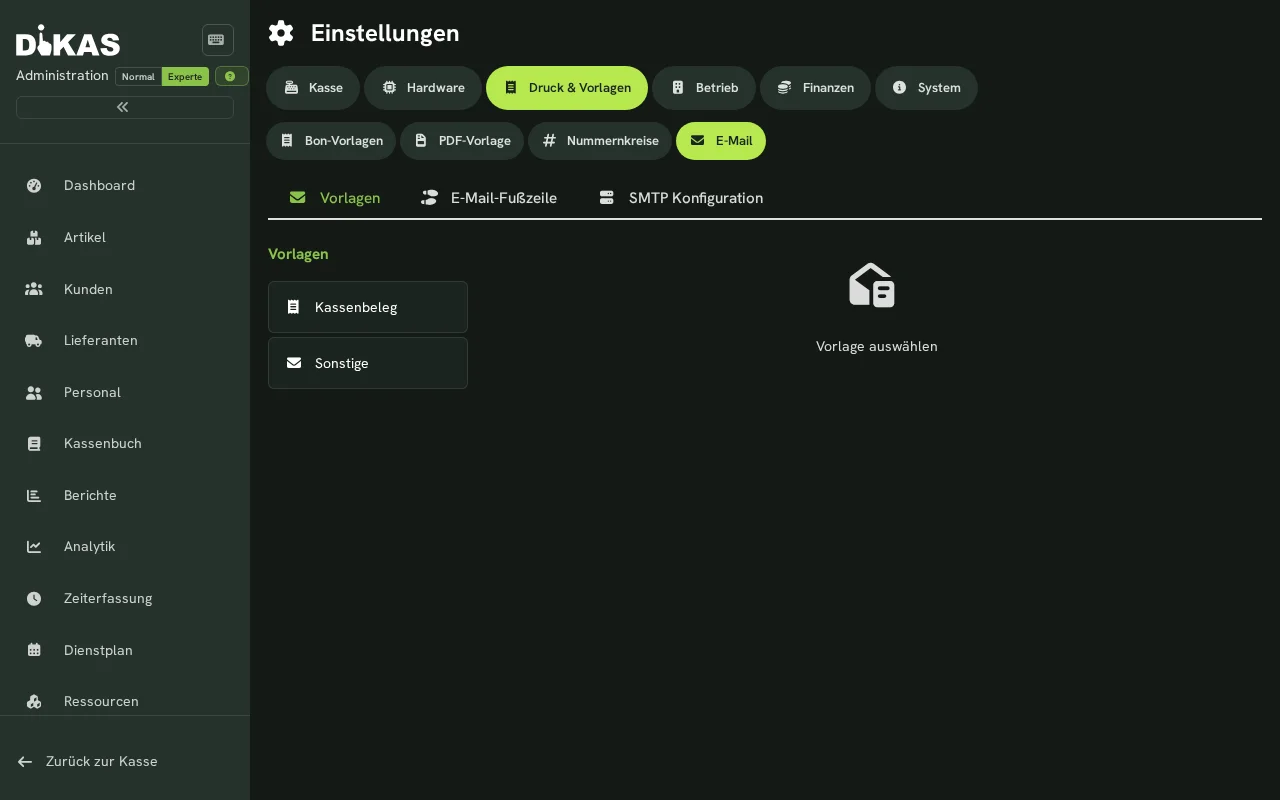
SMTP Configuration¶
| Setting | Description |
|---|---|
| SMTP Server | e.g. smtp.gmail.com, smtp.ionos.de |
| Port | 587 (STARTTLS) or 465 (SSL) |
| Username | Email address or account name |
| Password | Email password or app password |
| Use SSL | TLS/SSL encryption |
| Sender Name | e.g. "Pizzeria Da Mario" |
| Sender Address | e.g. info@pizzeria-mario.de |
| Invoice Sender | Separate address for invoices (optional) |
SMTP Detection: Simply enter your email address and DiKAS will attempt to automatically determine the correct SMTP settings.
Email Templates¶
Under the email tab you can edit templates for various occasions:
| Template | Usage |
|---|---|
| invoice | Invoice delivery |
| invoice_debit | Invoice delivery with SEPA direct debit |
| dunning1 | Payment reminder (dunning level 1) |
| dunning2 | Dunning notice (dunning level 2) |
| dunning3 | Final dunning notice (dunning level 3) |
| voucher | Voucher delivery |
Each template has a subject and HTML body with placeholders (→ Dunning).
Test Mode¶
| Setting | Description |
|---|---|
| Suppress Emails | Do not send real emails (test mode) |
| Redirect Address | Send all emails to this address instead of to customers |
8. DATEV¶
DATEV export configuration for the tax advisor:
| Setting | Description |
|---|---|
| Client Number | DATEV client |
| Advisor Number | Tax advisor number |
| Account Length | 4 or 5 digits |
| Revenue Account | Main account for revenue |
| Tax-Free Account | Account for 0% revenue |
| Card Clearing Account | Transit account for card payments |
| Expense Account | Default account for expenses |
| Article Group Mapping | Article groups → account mapping |
| ZIP Password | Encryption of the export file |
| Tax Advisor Email | For direct delivery |
| Tax Advisor Name | Displayed in the email |
| Include Expenses | Include expenses in DATEV export |
→ DATEV Export for details
9. ⚙️ System¶
Backend¶
Database & Synchronization¶
The database provider (CouchDB, SQLite or SQL Server) is set during server installation/configuration — it cannot be changed via the settings interface. The System tab shows only license, server version, and environment.
Cloud synchronization (multi-device) is configured via a separate "Cloud-Sync" tab (visible with support login only). The tab behaves differently depending on the database provider:
- SQL mode (SQLite/SQL Server): Push/pull synchronization of selected document types with the cloud CouchDB. Connection, interval, and document types are configurable; for legacy data in the cloud, a migration assistant guides through the transition.
- CouchDB mode (local installation): Native CouchDB replication — continuous and bidirectional for
maindbandgastrocurrent. The connection is set up automatically at server start from the license (SyncLink); stale replication entries pointing at the same database/server are cleaned up. The tab shows the state of the replication jobs and can re-check the setup on demand. No manual configuration is needed (a filledSyncsection inappsettings.jsonoverrides the license).
The cloud multi-tenant version has no synchronization — all devices work directly on the central database.
Audit Log¶
Log of all system changes. Audit logs can be downloaded as a file:
- Admin → Settings → System → "Audit Log"
- Select date → Download
API Keys¶
Backup & Restore¶
Your data is backed up automatically via the DiKAS Cloud — no manual backup, no download. Should a restore be needed, DiKAS Support takes care of it.
Draught Systems¶
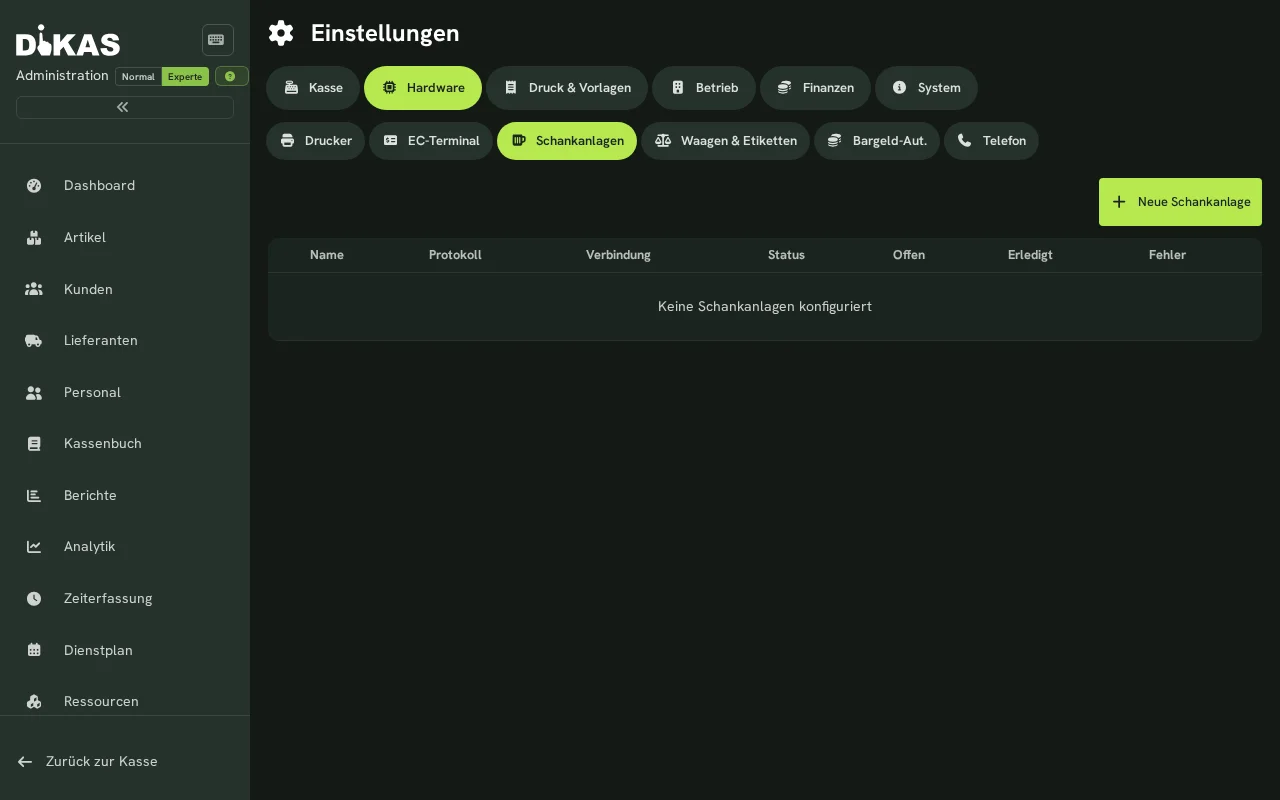
If tap systems are used:
Admin → Settings → Draught Systems
Configure a System¶
| Setting | Description |
|---|---|
| Name | Label for the system |
| Protocol | Gruber, Addimat, Hogatron, Simulator |
| Connection | Serial (COM), TCP, UDP |
| IP / Port | Network address |
| Reset at End-of-Day | Automatically reset counters |
Protocols¶
| Protocol | Description | Checksum |
|---|---|---|
| Gruber | STX/ETX framing, ENQ handshake | XOR |
| Addimat | STX/ETX framing | XOR-CRC |
| Hogatron | Configurable field lengths | — |
| Simulator | Test mode without hardware | — |
Each system is displayed as a status card (Online/Offline) with debug information and reconnect function.
AI Import (optional)¶
Powers intelligent article import with AI-assisted column recognition, as well as AI recognition of menu photos/PDFs (name, price, VAT class suggestion, allergens):
Admin → Settings → Operations → Services
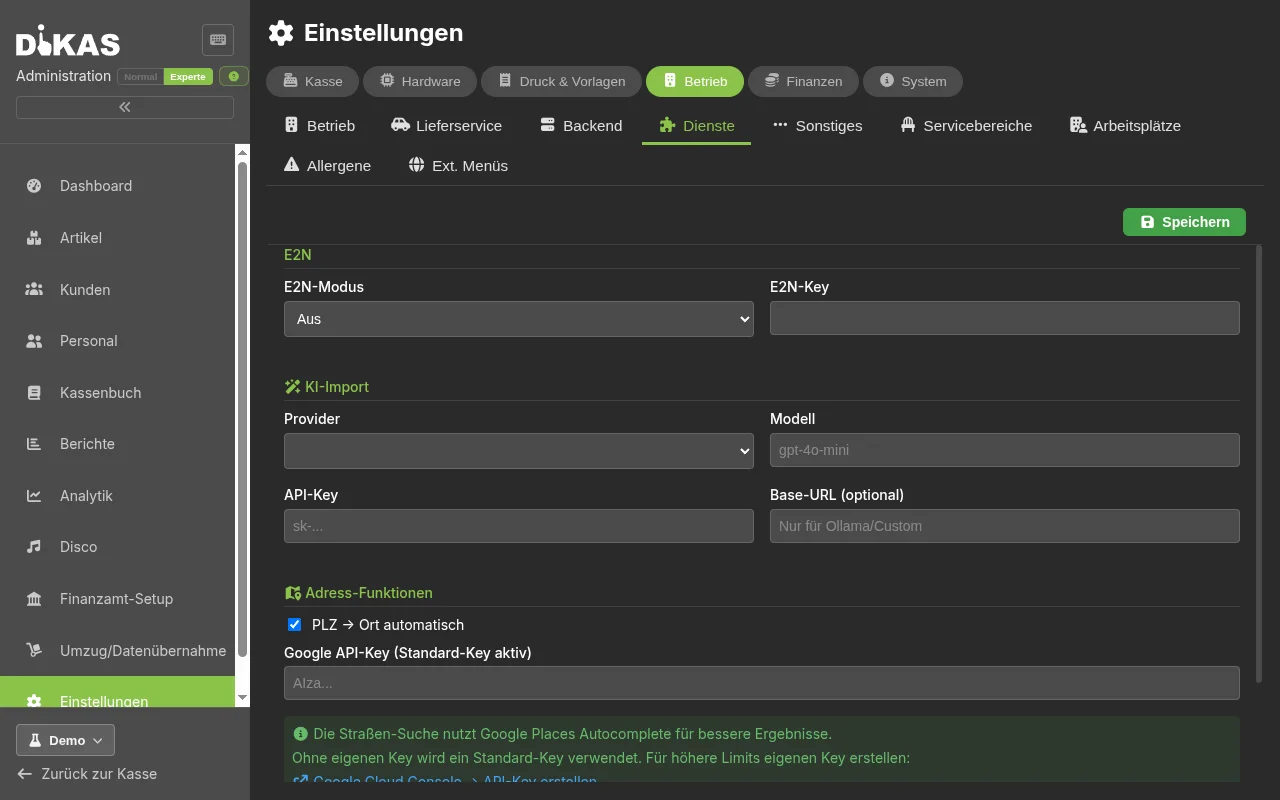
| Setting | Description |
|---|---|
| Provider | OpenAI, Anthropic, Gemini, Ollama (local) |
| API Key | Your API key with the provider |
| Model | e.g. gpt-4o-mini, claude-sonnet-4-5, gemini-2.0-flash, llama3.2-vision (Ollama) |
| Base URL (optional) | For Ollama/custom providers only: local server address |
Without your own API key, 2 free AI imports are available for photo/PDF import via the DiKAS key — after that, your own API key is required.
→ Data Import for details on article import and the correction loop
FinTS / Online Banking (optional)¶
For automatic bank statement retrieval:
| Setting | Description |
|---|---|
| Bank Code | Bank sort code |
| FinTS URL | FinTS server of the bank (automatic via bank code) |
| User ID | Online banking credentials |
| PIN | Online banking PIN |
| IBAN | Account IBAN |
| BIC | Bank identification |
| Account Holder | Name |
| TAN Method | pushTAN, chipTAN, smsTAN, etc. |
→ Banking & SEPA for details
Alarms for Online Transactions (optional)¶
The Alarms tab appears when the feature is enabled. Here you define which alarm sound plays on the local device for certain online events.
| Setting | Description |
|---|---|
| Alarm on reservation | Alarm type that plays on the local device when an online reservation arrives. Leave empty = no alarm |
How it works
When a new table reservation comes in via the web shop, the cloud immediately forwards a notification to the local machine (relay). The selected alarm is then played on the local device — similar to a waiter-call signal. Staff are alerted to new reservations even without looking at the screen.
Self-Order (optional)¶
Enable Self-order and/or QR table ordering under Operations → Operations in the module list. After saving, the corresponding tabs appear in the Operations category. The full tab selection is visible in the Expert view mode.
The complete guide QR ordering, self-service & pickup numbers walks through setup, the guest flow, kitchen, pickup and the number display. Table ordering by QR code for guests is also described in Table Self-Order.
The section headings of the Self-order tab are shown in German in every language; the English meaning is given in brackets.
| Area | Use |
|---|---|
| QR table ordering | Set automatic confirmation, PrePay and renewal of the table codes; create and print the codes under Service areas |
| Self-order → „Kiosk-Login" (kiosk login) | Store the username and password the kiosk uses to sign in |
| Self-order → „Automaten" (kiosks) | Per kiosk: name, its own card terminal and an optional receipt printer; copy the full device address |
| Self-order → „Abhol-Monitor" (pickup monitor) | Copy the address for a separate number screen and open it there; sign in if needed |
| Self-order → „Verzehr" (consumption) | Choice "eat in / take away" or operation without tables |
| Self-order → „Küche & Ausgabe" (kitchen & pickup) | Decide whether pure food orders are finished once the kitchen confirms them |
| Self-order → „Erlaubte Artikelgruppen" (allowed article groups) | Limit what the kiosk offers; without a selection all active groups are shown |
Using the gear icon of the pickup monitor you can choose your own logo (PNG, JPEG or WebP, at most 5 MB). Without your own logo the DiKAS logo appears. The device time is shown on the right of the header. Logo and hide time are saved for this browser.
The hide time for finished numbers is set with the gear icon of the pickup monitor (1, 2, 5, 10 or 15 minutes). Staff mark orders as finished under Kitchen → Pickup. The monitor itself is display only.
The public number page for guests' phones shows the same pickup numbers without sign-in and keeps finished numbers on screen for five minutes.
Customer Display (optional)¶
The customer display is a second, customer-facing screen at the POS. While ringing up it shows the running cart, after payment the receipt with a QR code, and while idle a slideshow of images and videos (ads, daily specials, logo).
Enable: tick Customer display in the module list under Admin → Settings → Operations → Operations (section Modules).
Prepare media before the display is in place
The Till → Customer display tab is always visible — also in Normal mode and also while the customer display is still switched off. So you can prepare images and videos at your leisure and connect the display afterwards.
Which device shows the display?¶
| POS station | Customer screen | Setup |
|---|---|---|
| DiKAS box (appliance) | second monitor directly on the box | sets itself up when switched on |
| Windows (POS computer or client) | second monitor directly on the PC | start the DiKAS Betragsanzeige shortcut, pair the code |
| DiKAS Windows client in full-screen mode | second monitor directly on the client PC | switch on once in the client, then no pairing needed |
| Cloud POS, tablet, TV stick, second PC | separate device with a browser | open the address and pair once |
DiKAS box: nothing to set up¶
If a second, customer-facing monitor is connected to the DiKAS box, the box detects it at start-up and shows the amount display there by itself — no address, no pairing code. Just enable the Customer display feature, connect the monitor and restart the box.
Connect the monitor before switching on
A screen plugged in while the box is running is not picked up. Connect the monitor, then restart the box.
Windows: the "DiKAS Betragsanzeige" shortcut¶
On Windows a dedicated shortcut for the guest screen is provided — in the Start menu and on the desktop, created by the setup. It belongs to the POS computer and to the Windows client. Its name is German on every system: DiKAS Betragsanzeige (DiKAS amount display).
- Connect the second monitor and enable it in Windows.
- Start DiKAS Betragsanzeige. The window opens full-screen on the second monitor and shows a six-digit pairing code.
- At the POS open the POS menu Settings (page Local Settings) → Customer display → Pair display and select the code.
The POS stays on the first screen; the second shows the cart, the total and, after payment, the receipt QR code.
Start automatically at sign-in
Esc closes the display again. To have it come up by itself in the morning, put the shortcut
into the startup folder: press Windows+R, enter shell:startup and copy the
DiKAS Betragsanzeige shortcut into it.
Without a second monitor
If only one screen is connected, the display opens on that one — handy for trying it out, but in operation it covers the POS. Esc closes it.
DiKAS Windows client: amount display on the second monitor¶
If the Windows client runs in full-screen mode anyway, it can also drive the second monitor without a pairing code — it then starts the display along with itself. Three things are needed:
- The second monitor is connected and enabled in Windows before the program starts.
- The client runs in full screen (kiosk mode).
- The setting for the amount display on the second screen is switched on.
The client's connection dialog is in German. Proceed as follows:
- In the client open the menu "DiKAS Client → Verbinden…" (connect) and click "Einstellungen dieses Arbeitsplatzes" (settings of this workstation).
- Tick "Vollbild (Kiosk-Modus)" (full screen, kiosk mode) and restart the client using the button offered.
- Open the dialog again — now "Betragsanzeige auf zweitem Bildschirm" (amount display on second screen) appears. Tick it, save and reconnect.
The main screen remains the POS; the second shows only the amount display.
Why the setting is sometimes missing
In normal window mode and when only one screen is detected, the option is deliberately hidden: a second full-screen window belongs at a real POS station, not at an office PC. In this case the dialog explains which step is still missing.
Set it up yourself: display in the browser¶
This route works with any device that has a browser and can reach the POS over the network — tablet, TV stick, old laptop, second monitor on a small mini PC. It is also the route for the Windows POS computer and for a POS in the cloud.
Step 1: The right address¶
| Your POS runs… | Address for the display |
|---|---|
| on a DiKAS box, a server or in a container | https://<POS address>/admin/display |
| in the DiKAS cloud under your own address | https://<your DiKAS address>/admin/display |
| on a Windows POS computer | https://<address of the POS computer>/display |
The address changes when opened
On a box, a server or in the cloud, DiKAS forwards /admin/display to the actual address of the
display — the browser then shows /app/display. That is correct; you can keep noting and
entering the address from the table.
Finding the address yourself
Look at how you operate the POS. If the address bar contains /admin, the display address
is /admin/display. If the POS opens directly under the main address, it is /display.
Examples: https://192.168.1.50/admin/display · https://192.168.1.50/display
Use the IP address or network name under which the display device reaches the POS.
localhost and 127.0.0.1 only work directly on the POS computer, never on a tablet or
another PC.
Step 2: The device must reach the POS¶
Both devices belong in the same network. As a test, first open https://<POS address> on the
display device: if the sign-in appears, the connection is fine.
The Windows installer is a single-station version
The direct Windows version can only be reached on the POS computer itself. A second monitor on that computer works; a tablet or separate PC, however, is another client. For that, use a VM/ISO appliance as the main POS.
Step 3: Pair once¶
- Open the address in the browser on the customer screen.
- The screen shows a six-digit pairing code (with the German note "Diesen Code in den POS-Einstellungen eingeben" — enter this code in the POS settings).
- At the POS open the POS menu Settings (page Local Settings) → Customer display → Pair display and select the display with this code.
The display runs without login (kiosk) and fetches its content automatically — no user needs to be signed in.
Full screen and screen saver
On the display device switch the browser to full-screen mode with F11 and turn off power saving or the screen saver — otherwise the guest screen goes black in the middle of the evening. Also keep a tablet permanently plugged in.
Certificate warning on first opening
With a local installation the browser may warn about a self-issued HTTPS certificate. Only confirm the exception if the address shown really is your DiKAS POS. Then open the display page again.
Pair again after the POS restarts
The address stays the same. The POS only remembers the pairing itself until its next restart or update. Reload the display page afterwards (F5) — if a code appears again, repeat step 3.
Display Modes¶
| Mode | Shows |
|---|---|
| Pairing | Pairing code until the display is connected to a register |
| Idle | Slideshow of the uploaded media; without media a "Willkommen" (welcome) screen |
| Cart | Live line items and total while ringing up |
| Receipt | "Vielen Dank!" (thank you), receipt number, amount and a QR code to the digital receipt |
Managing the slideshow and welcome media¶
Under Admin → Settings → Till → Customer display. This page is labelled in German on every system:
| Action | Description |
|---|---|
| Upload media | Drag & drop or click. Allowed are images (JPEG, PNG, GIF, WebP) and videos (MP4, WebM), up to 100 MB each |
| Welcome media (section "Willkommen-Bild") | A separate image or video for the welcome screen — what the guest sees when nothing is being rung up and no slideshow is running |
| Delete media | Remove individual images or videos from the slideshow |
| Change interval ("Bildwechsel-Intervall (Sekunden)") | Seconds per image (3–120, default 10) |
The media are shown one after another in idle mode and are loaded by the display without login. Newly uploaded media appear on all paired displays within a few seconds.
Keep videos short and silent
An advertising video plays without sound and repeats all evening. 10–20 seconds work better than a long film, and a smaller file starts faster on a tablet.
If no amounts appear¶
- Reload the display page (F5). If the POS was restarted or updated in the meantime, the pairing is gone. The page does not notice this by itself: it keeps showing its last picture. After reloading a new code appears — pair again with it.
- Check that the Customer display feature is enabled.
- Check that the POS and the customer display use the same DiKAS POS — with several locations or a test address this is the most common cause.
- For a tablet or separate PC, check whether the POS address can be reached from that device. Do
not use
localhostor127.0.0.1. For such multi-station set-ups a VM/ISO appliance is intended as the main POS, not the Windows single-station installation. - On Windows: close the display with Esc and start the DiKAS Betragsanzeige shortcut again. It then shows a code for pairing again.
- If you use the automatic route on the client, check the full-screen mode: it only exists there, and the monitor must already be connected when the program starts.
Further Options (Quick Reference)¶
These switches and fields exist in the settings but are needed less frequently:
| Option | Location | Description |
|---|---|---|
| Portal active / Portal URL | System | Activate customer portal (online access for invoices/subscriptions) and enter address |
| Stripe / PayPal | Finance | Payment providers for online payments (delivery service prepayment, portal) |
| E2N | Services | Interface to E2N time recording |
| External Customer Search / CheckPrice / Invoice Webhook | Services | Webhooks for ERP integrations: customer search in external system, external price check, notification on invoice creation |
| Voucher serial number format | Operations | Format (numeric/alphanumeric) and length (4–16) of generated voucher numbers |
| Print remaining-value receipt on redemption | Payments | Automatically print a voucher receipt with the new remaining value when paying with a voucher (only if a remaining balance > 0 is left afterward). Off by default |
| Frontend visibility switches | POS → Frontend | Show/hide individual POS menu items/buttons |
| Block below minimum order value | Operations → Delivery | Reject delivery orders below the zone minimum order value instead of adding a surcharge |
| autoShutDownAfterClose | System | Automatically shut down device after end-of-day report (POS PC) |
| closeDayBackendOnly | System | Allow end-of-day report only from the admin area (not at the POS) |
Next Step¶
→ Data Import & Export — Import and back up data